> ## Documentation Index
> Fetch the complete documentation index at: https://docs.intellikon.ai/llms.txt
> Use this file to discover all available pages before exploring further.
# Your profile
> Change your name and languages, turn on two-factor authentication, connect Gmail and sign out.
Your profile holds your own details and settings. Changes here apply only to you, not to anyone else in your workspace. Open it from the menu under your initials, then **Account settings**.
## Update your details
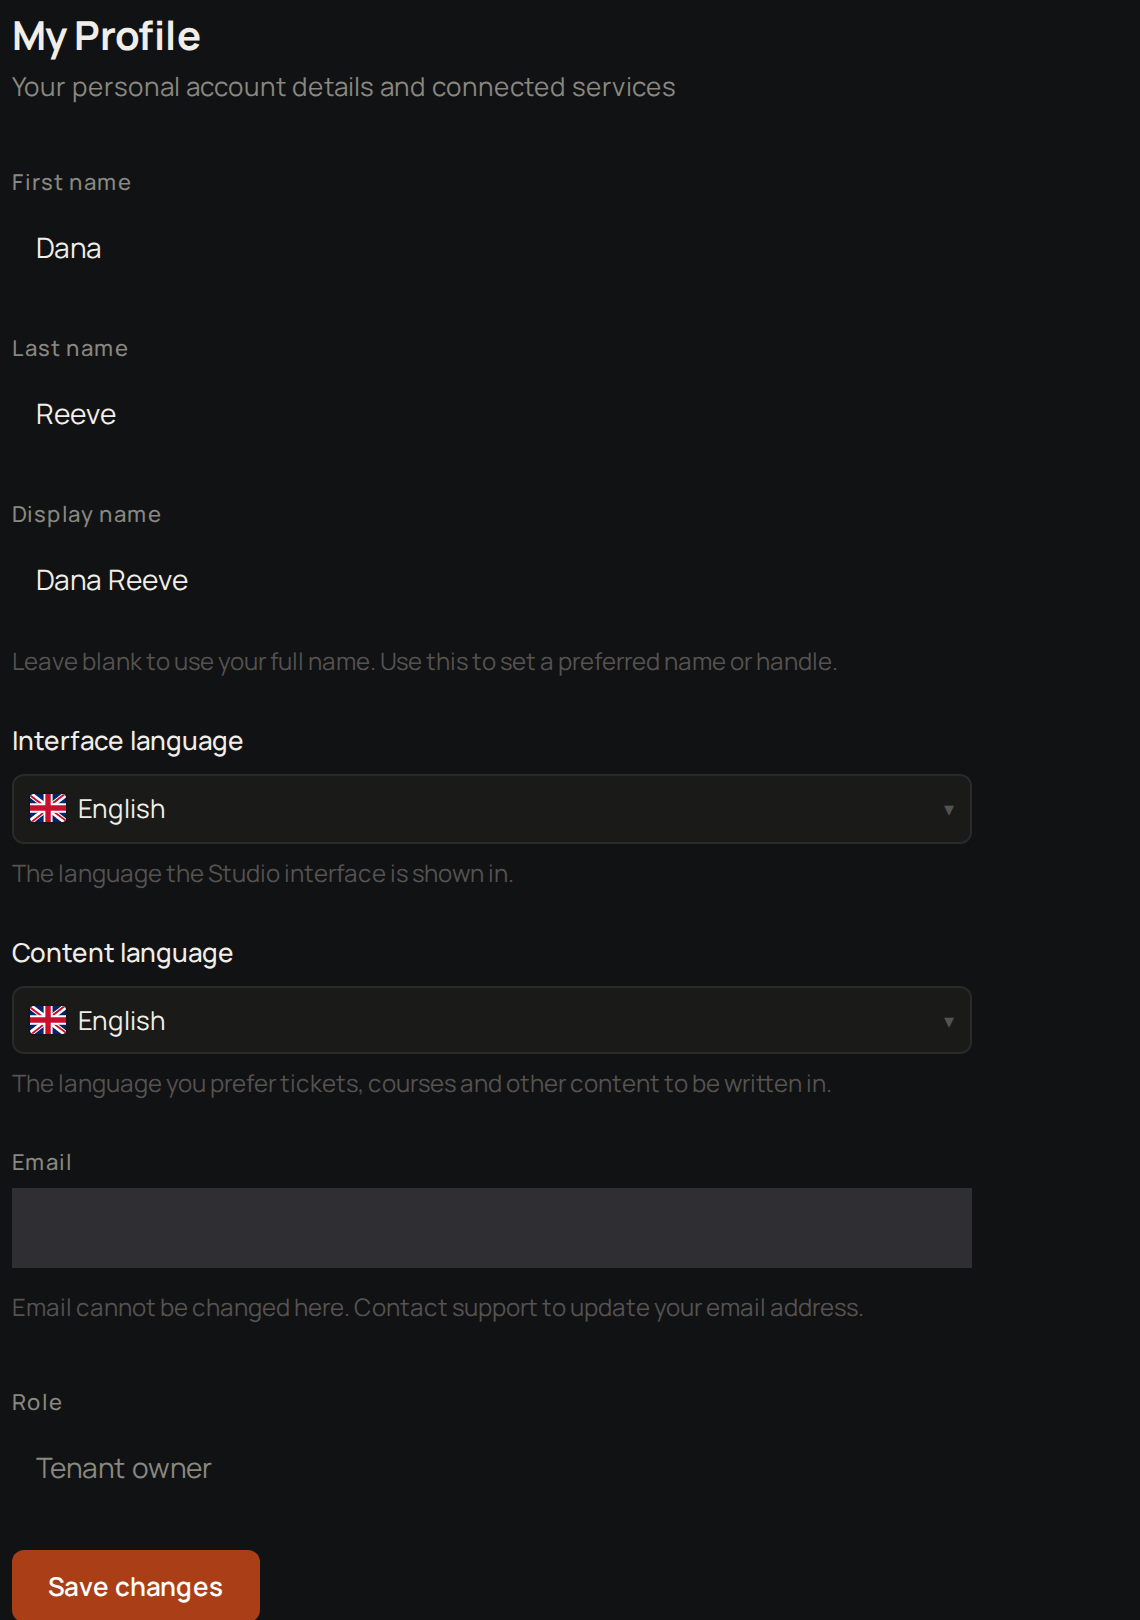 Select your initials at the top right, then **Account settings**.
If your name needs changing, edit it.
If you prefer to be known by something else, set a **Display name**.
Choose your **Interface language**. This is the language Studio is shown in.
Choose your **Content language**. This is the language you would like tickets, courses and other content in.
Select **Save changes**.
Studio confirms that your profile is saved. Your full name is the sender name on your Pulse outreach. Your email address cannot be changed here. Contact support if it needs to change. Next, [turn on two-factor authentication](#turn-on-two-factor-authentication).
## Turn on two-factor authentication
With two-factor authentication on, Studio asks for a code from an authenticator app when you sign in.
Under **Two-factor authentication**, select **Enable two-factor authentication**.
Scan the QR code with your authenticator app.
If you cannot scan the QR code, enter the key shown below it instead.
Type the 6-digit code your app shows.
Select **Copy all** or **Download as .txt**.
Keep the codes somewhere safe. Each one lets you sign in once if you lose your authenticator.
Tick **I have saved my recovery codes**.
Select **Done**.
Your profile now shows two-factor authentication as **Enabled**. Next time you sign in, Studio asks for a code. Next, [connect Gmail](#connect-gmail) if you use Pulse.
## Connect Gmail
Select your initials at the top right, then **Account settings**.
If your name needs changing, edit it.
If you prefer to be known by something else, set a **Display name**.
Choose your **Interface language**. This is the language Studio is shown in.
Choose your **Content language**. This is the language you would like tickets, courses and other content in.
Select **Save changes**.
Studio confirms that your profile is saved. Your full name is the sender name on your Pulse outreach. Your email address cannot be changed here. Contact support if it needs to change. Next, [turn on two-factor authentication](#turn-on-two-factor-authentication).
## Turn on two-factor authentication
With two-factor authentication on, Studio asks for a code from an authenticator app when you sign in.
Under **Two-factor authentication**, select **Enable two-factor authentication**.
Scan the QR code with your authenticator app.
If you cannot scan the QR code, enter the key shown below it instead.
Type the 6-digit code your app shows.
Select **Copy all** or **Download as .txt**.
Keep the codes somewhere safe. Each one lets you sign in once if you lose your authenticator.
Tick **I have saved my recovery codes**.
Select **Done**.
Your profile now shows two-factor authentication as **Enabled**. Next time you sign in, Studio asks for a code. Next, [connect Gmail](#connect-gmail) if you use Pulse.
## Connect Gmail
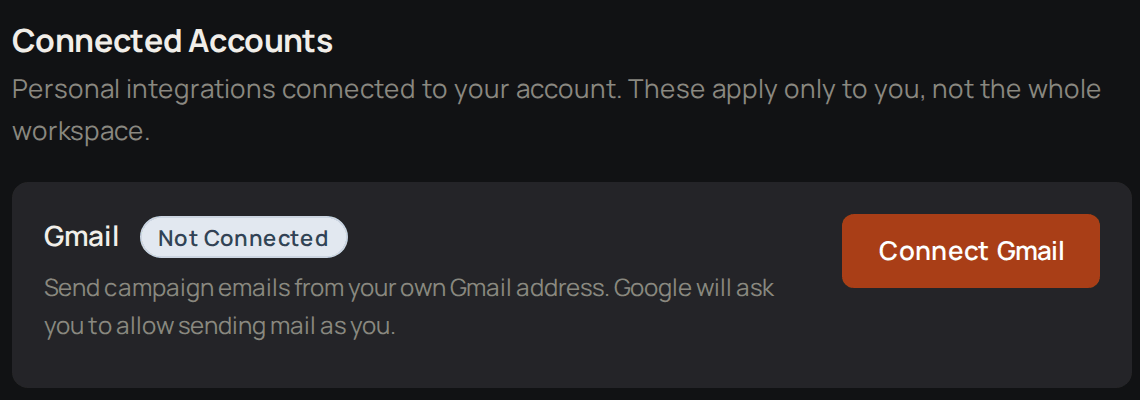 Connecting Gmail lets you send campaign emails from your own Gmail address. It connects your account only, not the whole workspace.
Under **Connected Accounts**, select **Connect Gmail**.
Allow access when Google asks.
If you want to see replies to your campaigns in your Pulse **Inbox**, select **Enable reply detection**.
If you turned on reply detection, confirm access with Google again.
The status then reads **Connected - sending and reply detection**. Next, [run a campaign](/products/pulse/campaigns).
## Sign out
Select your initials at the top right, then **Sign out**.
Studio signs you out and shows the sign-in screen. When you come back, [sign in](/get-started/sign-in) again.
Connecting Gmail lets you send campaign emails from your own Gmail address. It connects your account only, not the whole workspace.
Under **Connected Accounts**, select **Connect Gmail**.
Allow access when Google asks.
If you want to see replies to your campaigns in your Pulse **Inbox**, select **Enable reply detection**.
If you turned on reply detection, confirm access with Google again.
The status then reads **Connected - sending and reply detection**. Next, [run a campaign](/products/pulse/campaigns).
## Sign out
Select your initials at the top right, then **Sign out**.
Studio signs you out and shows the sign-in screen. When you come back, [sign in](/get-started/sign-in) again.