> ## Documentation Index
> Fetch the complete documentation index at: https://docs.intellikon.ai/llms.txt
> Use this file to discover all available pages before exploring further.
# Nucleus settings
> Set up the products and types that every prompt is filed under.
Every prompt in Nucleus is filed under a product and a type. A product is a group, such as Pulse or Aegis, and a type is a kind of prompt within it, such as an outreach draft or a ticket triage. You choose both when you create a prompt, and you can filter **Prompts** by them. Nucleus settings is where you add and change them.
## Before you start
Nucleus settings is for Tenant Owners and Workspace Admins. Open it from **Settings** at the bottom of the Nucleus sidebar. It has two tabs, **Products** and **Types**.
## Add a product
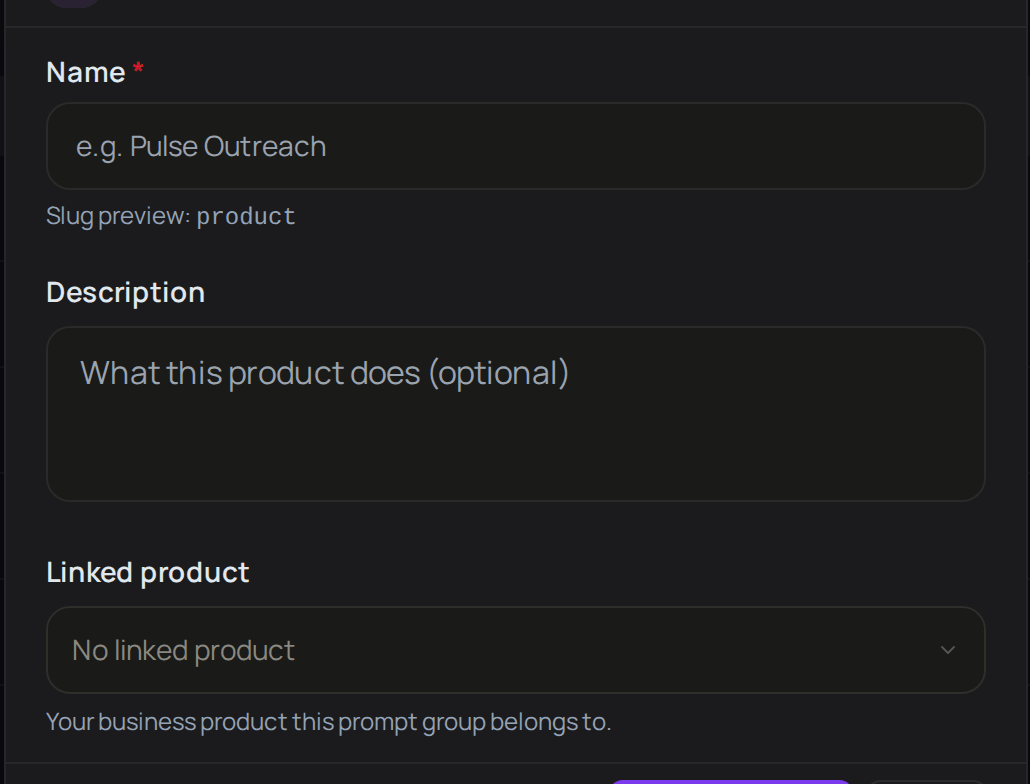 Select **Settings**, then **Add Product**.
Enter a **Name**. Nucleus shows the slug it will use underneath.
Add a **Description** if you want one.
Select **Create Product**.
The product now appears on the **Products** tab with no types yet. Next, [add a type](#add-a-type) to it.
## Add a type
Select **Settings**, then **Add Product**.
Enter a **Name**. Nucleus shows the slug it will use underneath.
Add a **Description** if you want one.
Select **Create Product**.
The product now appears on the **Products** tab with no types yet. Next, [add a type](#add-a-type) to it.
## Add a type
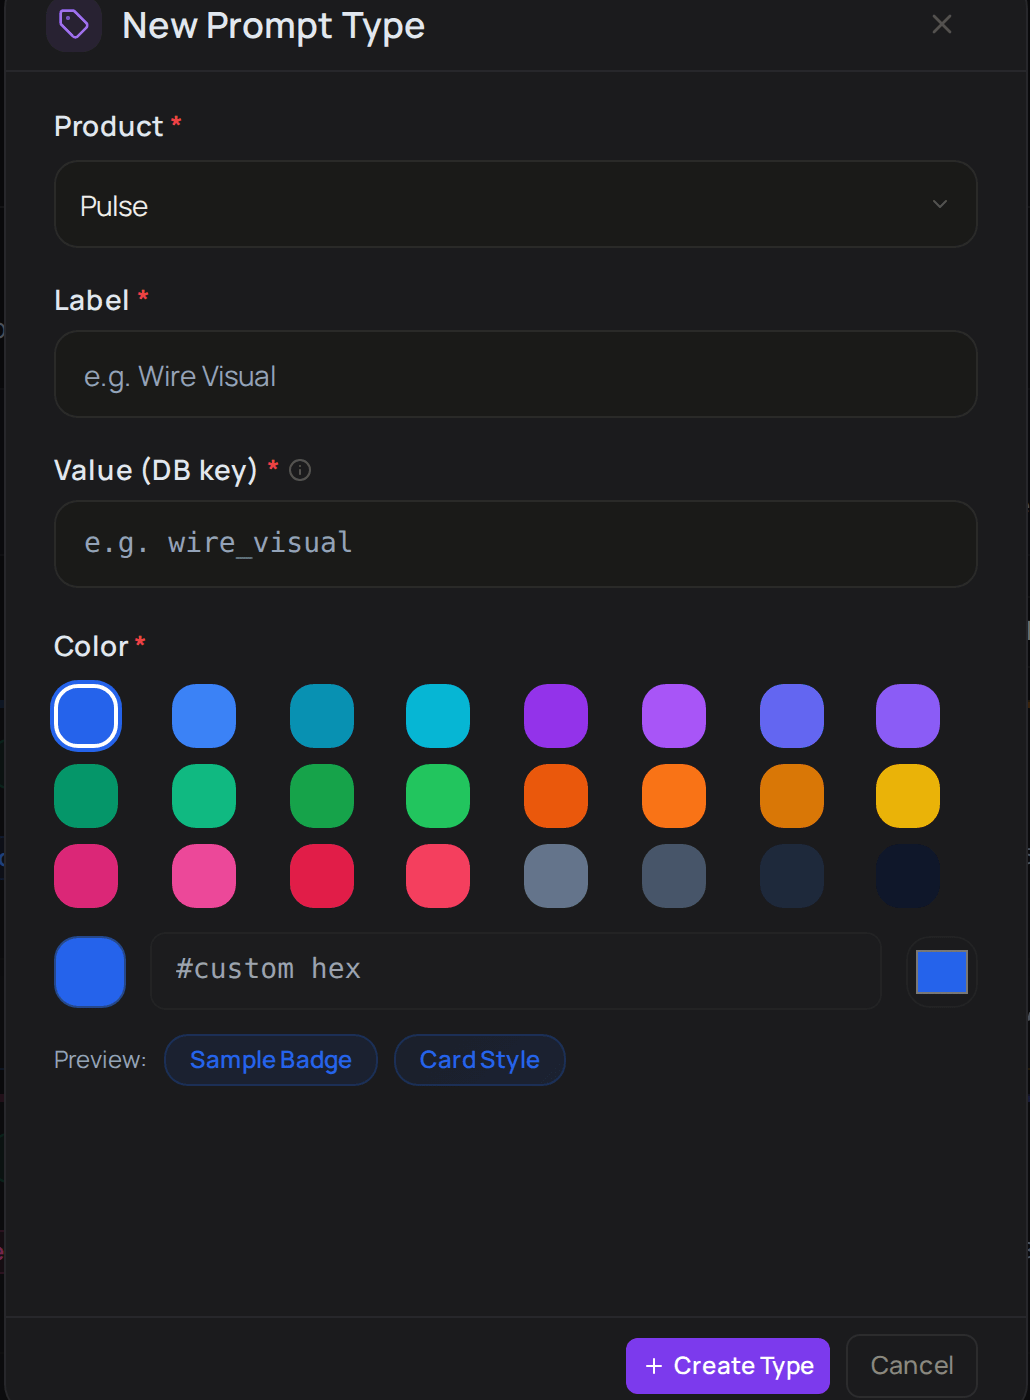 Select **Settings**, the **Types** tab, then **Add Type**.
Pick the **Product** the type belongs to.
Enter a **Label**, such as "Renewal reminder".
Choose a **Color**. The preview shows how the type's badge will look.
Select **Create Type**.
The type now appears on the **Types** tab, and the product's count of types goes up by one. When someone creates a prompt and chooses this product, the type is in the **Type** list. Next, [create a prompt](/products/nucleus/prompts#create-a-prompt) with it.
## Change a product or type
On **Products**, select **Edit product** on the row, or on **Types**, select **Edit** on the type.
Make your change.
Select **Save Changes**.
The new name shows straight away in the list. Next, [create a prompt](/products/nucleus/prompts#create-a-prompt).
## Troubleshooting
Nucleus settings is for Tenant Owners and Workspace Admins. Ask one of them to add the product or type you need.
Select **Settings**, the **Types** tab, then **Add Type**.
Pick the **Product** the type belongs to.
Enter a **Label**, such as "Renewal reminder".
Choose a **Color**. The preview shows how the type's badge will look.
Select **Create Type**.
The type now appears on the **Types** tab, and the product's count of types goes up by one. When someone creates a prompt and chooses this product, the type is in the **Type** list. Next, [create a prompt](/products/nucleus/prompts#create-a-prompt) with it.
## Change a product or type
On **Products**, select **Edit product** on the row, or on **Types**, select **Edit** on the type.
Make your change.
Select **Save Changes**.
The new name shows straight away in the list. Next, [create a prompt](/products/nucleus/prompts#create-a-prompt).
## Troubleshooting
Nucleus settings is for Tenant Owners and Workspace Admins. Ask one of them to add the product or type you need.