> ## Documentation Index
> Fetch the complete documentation index at: https://docs.intellikon.ai/llms.txt
> Use this file to discover all available pages before exploring further.
# Data sources
> Connect a Studio product, a file or a database so reports, monitors, metrics and Ask can use it.
A data source is a set of data Prism can read. Reports, monitors, metrics and Ask each work from one. Your Studio products are built in: Vera, Aegis, Pulse and Lexis connect inside Prism with no export or import step. Adding a file or a database is optional, for when you want Prism to work with data from outside Studio.
## Before you start
Tenant Owners and Workspace Admins can connect data sources. Workspace Members can see the sources already connected.
## Connect a built-in source
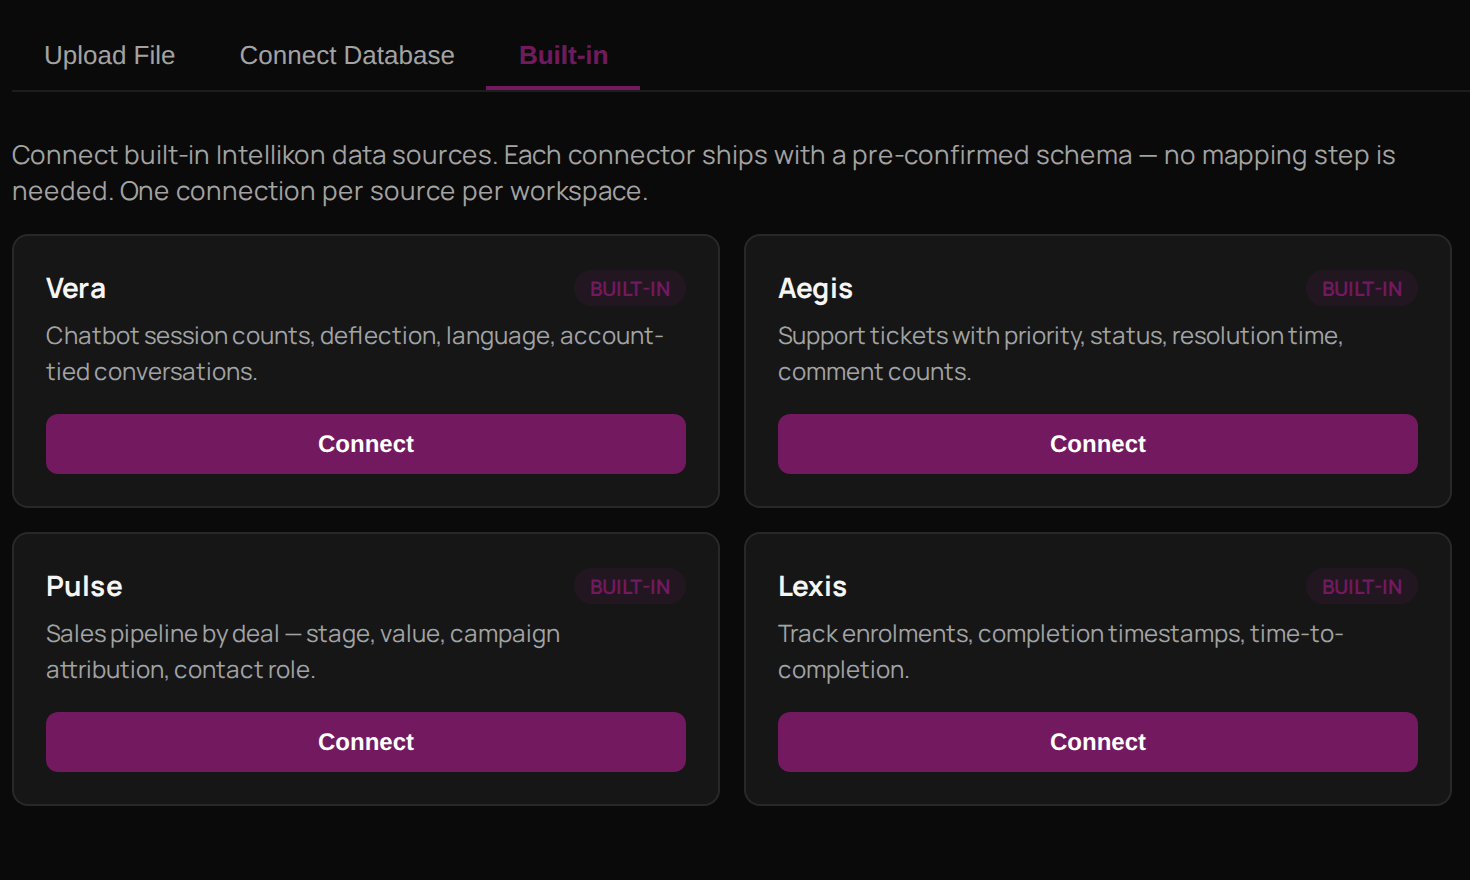 Each Studio product gives you one built-in source.
| Source | What it holds |
| ------ | ------------------------------------------------------------------------------------- |
| Vera | Chatbot conversations, with their language and the account they were tied to. |
| Aegis | Support tickets, with their priority, status, time to resolve and number of comments. |
| Pulse | Your sales pipeline by deal, with stage, value, campaign and the contact's role. |
| Lexis | Enrolments and completions, and how long people took to finish. |
Select **Data Sources**, then **Connect new source**.
Select **Built-in**.
Under the product you want, select **Connect**.
Prism opens the new source, ready to use. Built-in sources need no setting up, because Prism already knows how their data is laid out. Next, [create a report](/products/prism/reports) from it.
## Upload a file
Each Studio product gives you one built-in source.
| Source | What it holds |
| ------ | ------------------------------------------------------------------------------------- |
| Vera | Chatbot conversations, with their language and the account they were tied to. |
| Aegis | Support tickets, with their priority, status, time to resolve and number of comments. |
| Pulse | Your sales pipeline by deal, with stage, value, campaign and the contact's role. |
| Lexis | Enrolments and completions, and how long people took to finish. |
Select **Data Sources**, then **Connect new source**.
Select **Built-in**.
Under the product you want, select **Connect**.
Prism opens the new source, ready to use. Built-in sources need no setting up, because Prism already knows how their data is laid out. Next, [create a report](/products/prism/reports) from it.
## Upload a file
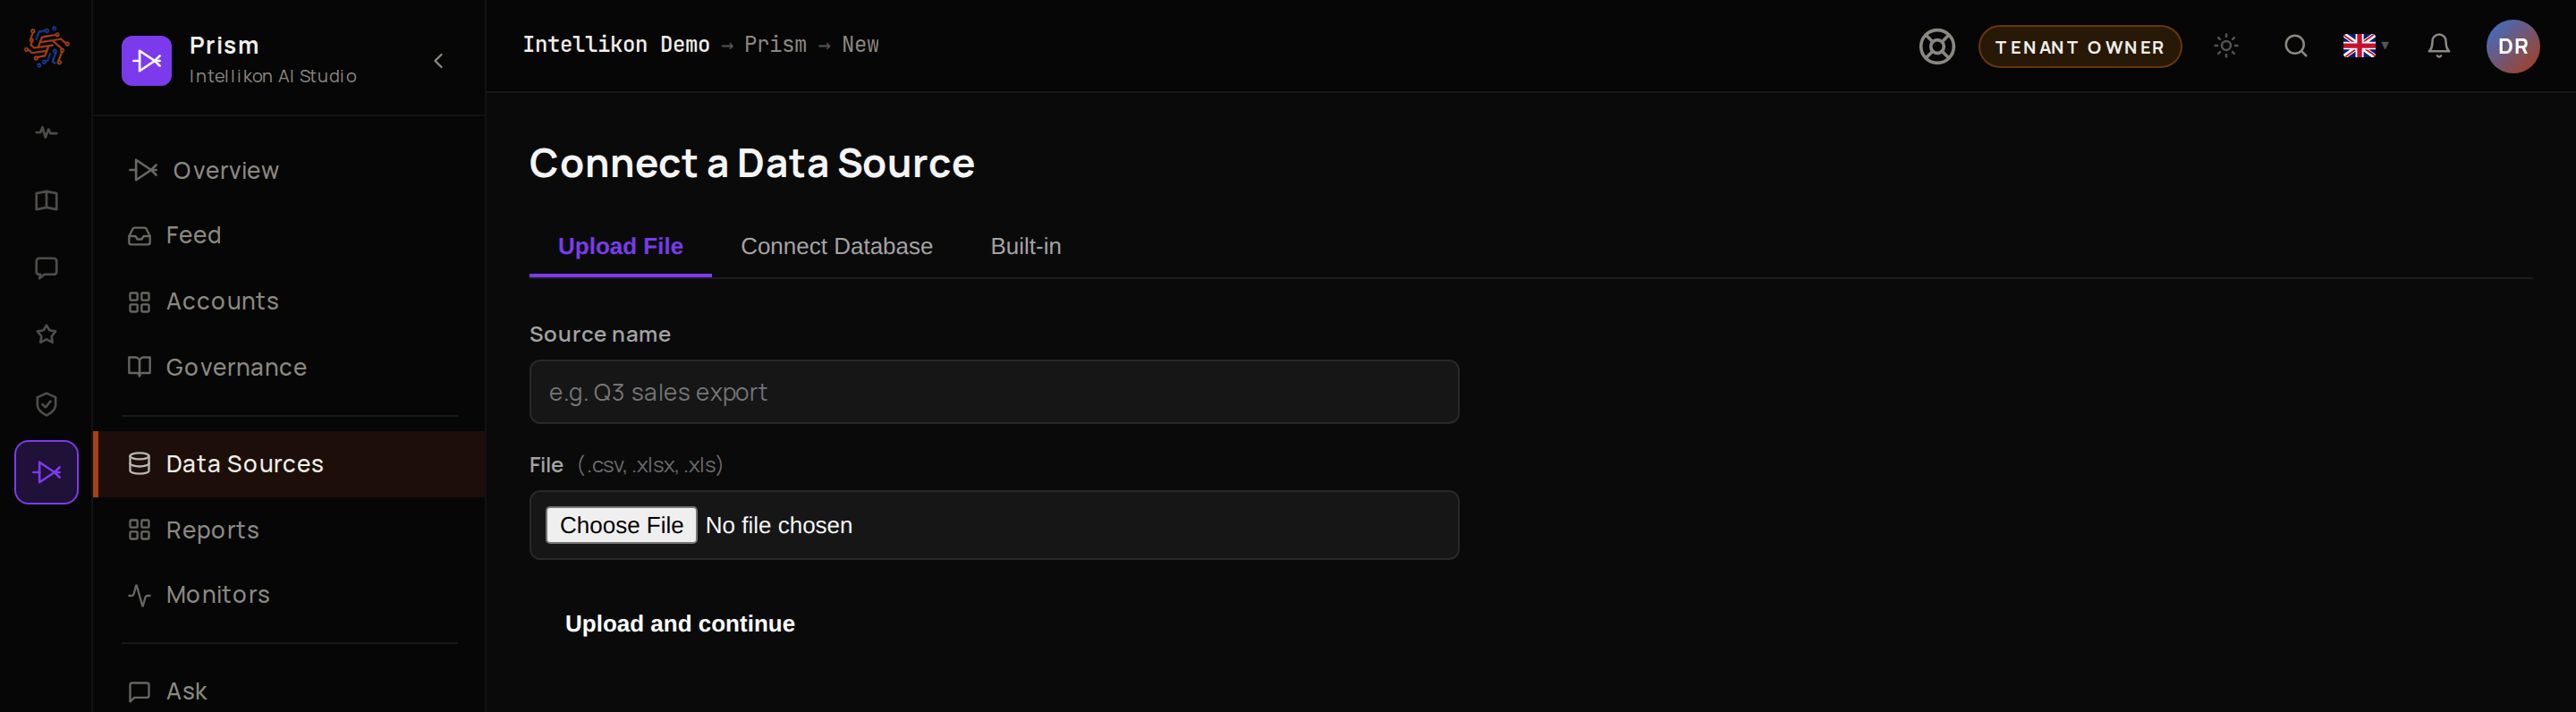 Select **Data Sources**, then **Connect new source**. **Upload File** is already selected.
Enter a **Source name** your team will recognise.
Under **File**, choose a CSV or Excel file.
Select **Upload and continue**.
Prism opens the new source. Unlike a built-in source, a file needs checking before you use it: on the source's page, confirm how Prism has read each column. Next, [create a report](/products/prism/reports).
## Connect a database
Select **Data Sources**, then **Connect new source**. **Upload File** is already selected.
Enter a **Source name** your team will recognise.
Under **File**, choose a CSV or Excel file.
Select **Upload and continue**.
Prism opens the new source. Unlike a built-in source, a file needs checking before you use it: on the source's page, confirm how Prism has read each column. Next, [create a report](/products/prism/reports).
## Connect a database
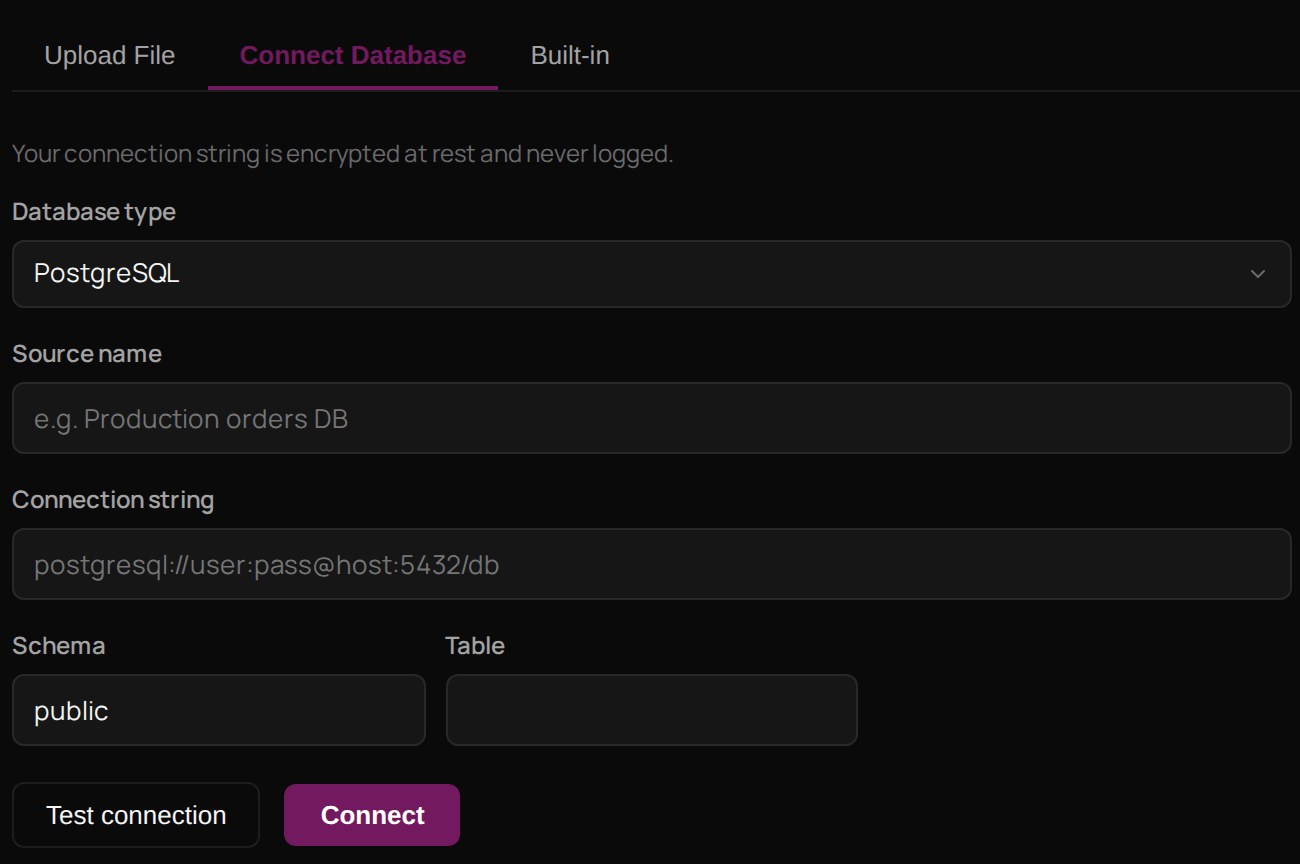 Select **Data Sources**, then **Connect new source**, then **Connect Database**.
Under **Database type**, choose **PostgreSQL**, **MySQL / MariaDB**, **SQLite** or **SQL Server**.
Enter a **Source name** your team will recognise.
Enter the **Connection string**.
Enter the **Table** to read.
If the form shows any other field for that type, such as **Schema**, fill it in.
Select **Test connection** and wait for the result.
Select **Connect**.
Prism opens the new source. As with a file, confirm how Prism has read each column on the source's page before you use it. Prism keeps your connection string encrypted. Next, [create a report](/products/prism/reports).
## Troubleshooting
Enter a **Source name** and choose a file. Both are needed before you can upload.
Read the reason after **Failed**, such as the username or password being rejected. Correct the connection string, then test again.
Each built-in source can be connected once per workspace. Open the one you already have from **Data Sources**.
Select **Data Sources**, then **Connect new source**, then **Connect Database**.
Under **Database type**, choose **PostgreSQL**, **MySQL / MariaDB**, **SQLite** or **SQL Server**.
Enter a **Source name** your team will recognise.
Enter the **Connection string**.
Enter the **Table** to read.
If the form shows any other field for that type, such as **Schema**, fill it in.
Select **Test connection** and wait for the result.
Select **Connect**.
Prism opens the new source. As with a file, confirm how Prism has read each column on the source's page before you use it. Prism keeps your connection string encrypted. Next, [create a report](/products/prism/reports).
## Troubleshooting
Enter a **Source name** and choose a file. Both are needed before you can upload.
Read the reason after **Failed**, such as the username or password being rejected. Correct the connection string, then test again.
Each built-in source can be connected once per workspace. Open the one you already have from **Data Sources**.