
Every ticket a customer raises lands in your Inbox. Open one and you see the whole conversation, with the customer’s company, their past tickets and your team’s notes about them on the right. You reply to the customer from the same page, and add internal notes that only your team can read.

Before you start

Your customers need their own sign-in to Studio, with Aegis turned on for their company. Tenant Owners and Workspace Admins do this in Studio settings under Accounts: open the company, turn on Aegis on its Products tab, and add its people on the Users tab with Invite user.

Find a ticket

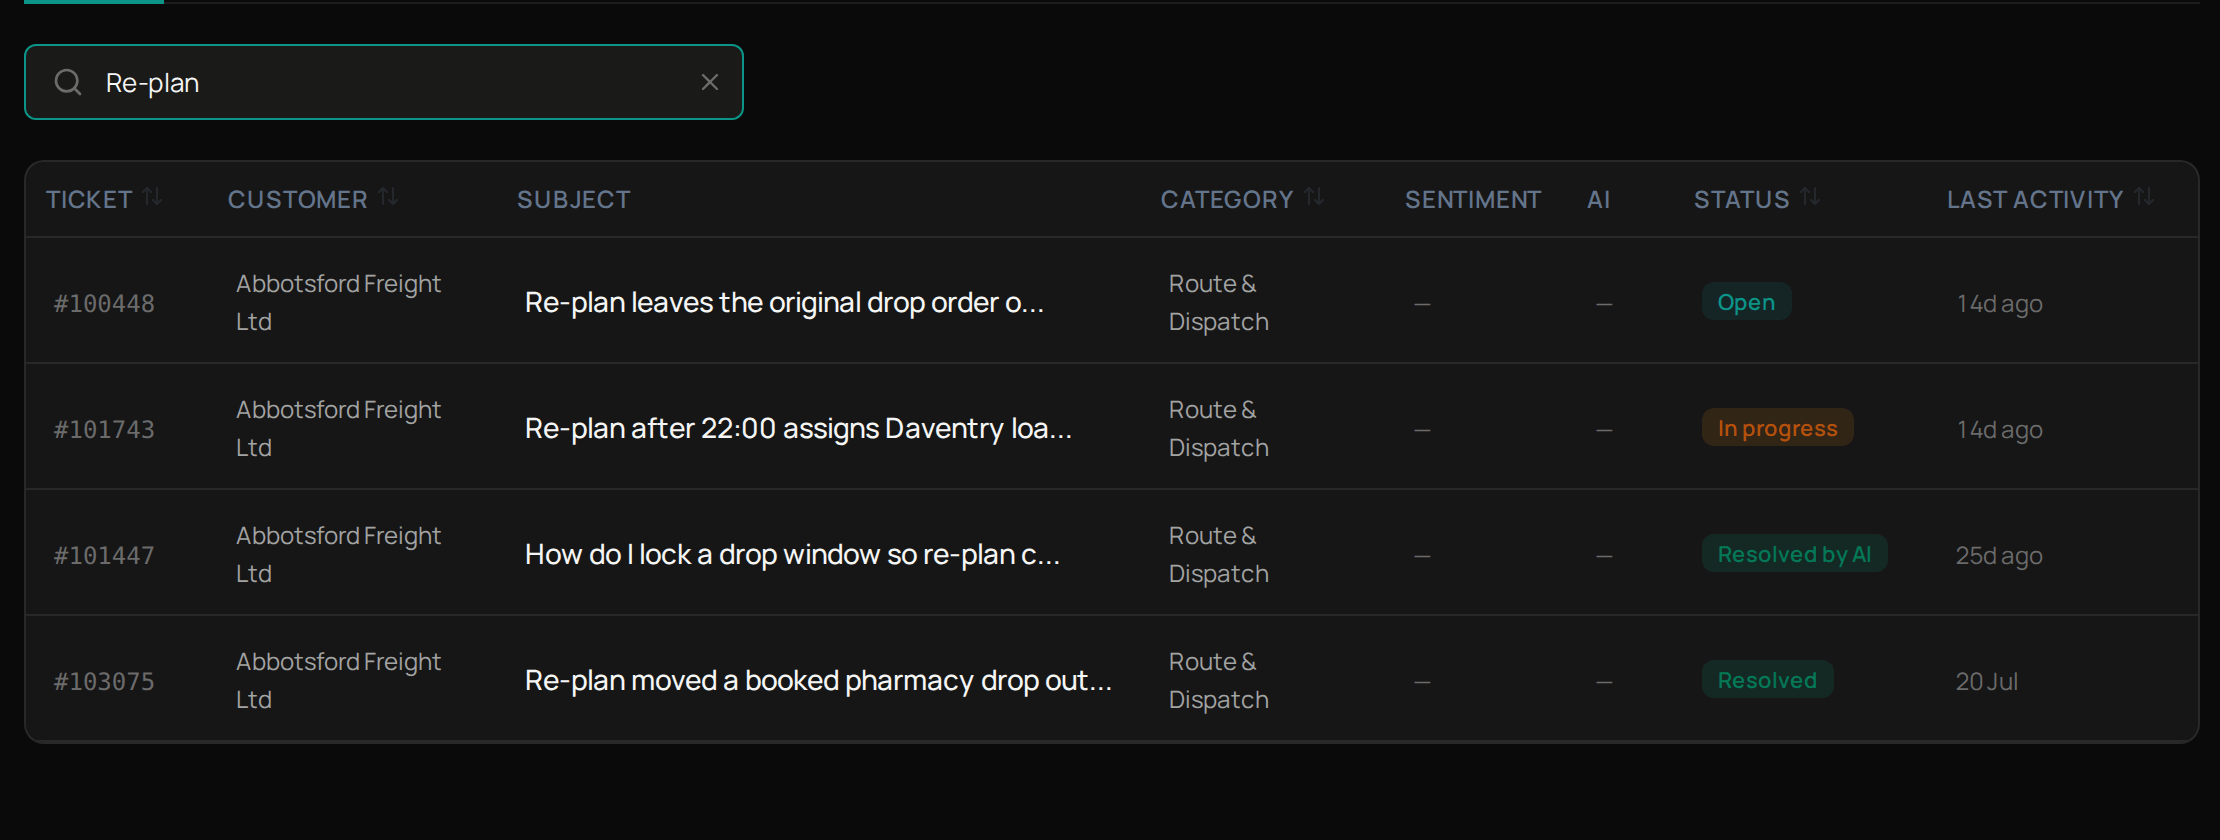
The Inbox status tabs and a search for tickets about re-planning, with the matching tickets and their status.
Select Inbox. The figures at the top show how many tickets are open and in progress, your average response time and the share of tickets Aegis resolved itself. Use the tabs to see Open, In progress, Resolved or Resolved by AI tickets, Account to see one company, and the search box to find a ticket by its subject. Tickets past their reply time show BREACHED next to the subject. Select a ticket to open it. Next, reply to the customer.

Reply to a customer

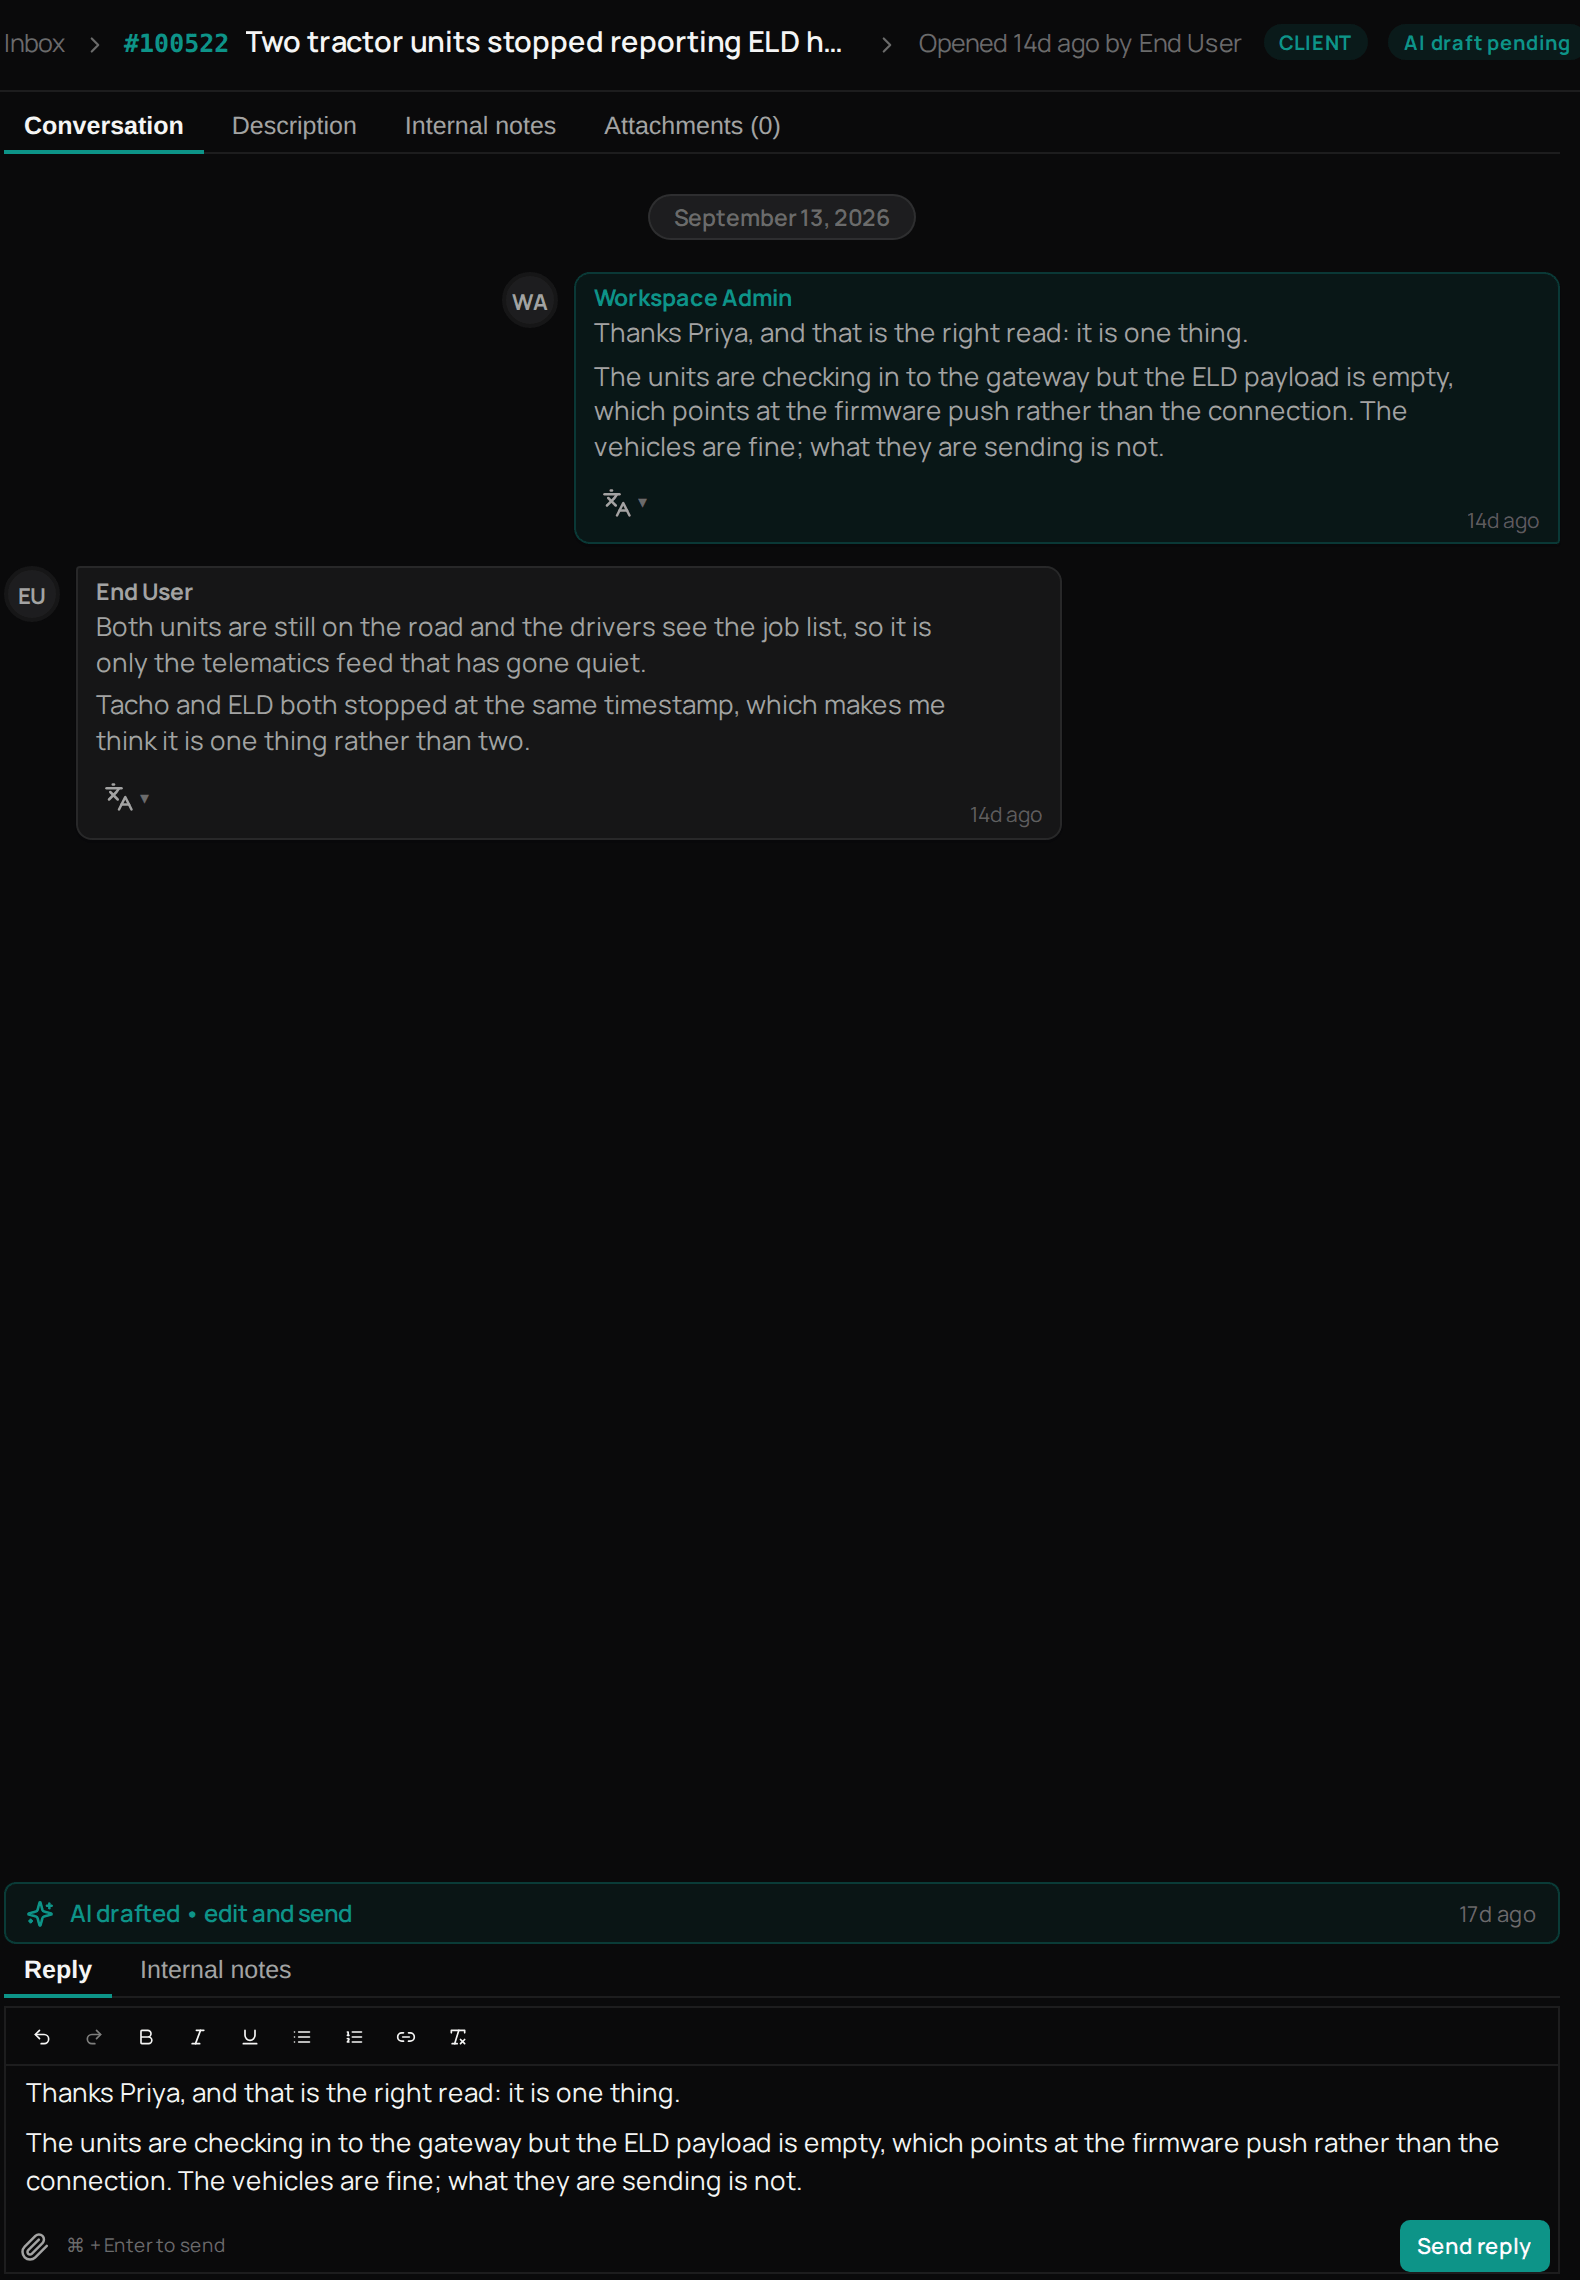
A customer ticket open in the Inbox, with the conversation and the reply box with its Send reply button.
1

Open the ticket

Select Inbox, then the ticket.
2

Read the conversation

Check every message under Conversation, what the customer first wrote under Description, and any files under Attachments.
3

Write your reply

Under Reply, type your answer.
4

Edit a suggested reply

If Aegis has already suggested one, marked AI drafted, edit it until it says what you want.
5

Send

Select Send reply.
Your reply now shows in the conversation, and Aegis emails it to the customer who raised the ticket. When they reply, the person assigned to the ticket gets an email. Next, triage the ticket.
To read a message in another language, open the translate menu under it and choose a language. Press ? on a ticket to see its keyboard shortcuts.

Add an internal note

1

Switch to notes

Below the conversation, select Internal notes.
2

Write the note

Type your note. Customers never see it.
3

Save it

Select Add note.
The note now shows under the Internal notes tab at the top of the ticket. Tenant Owners and Workspace Admins can write notes. Workspace Members can read them if a Tenant Owner or Workspace Admin allows it in Aegis settings. For a note about the customer rather than this ticket, type in Notes on the right. It saves when you stop typing and shows on every ticket from that company. Next, triage the ticket.

Triage a ticket

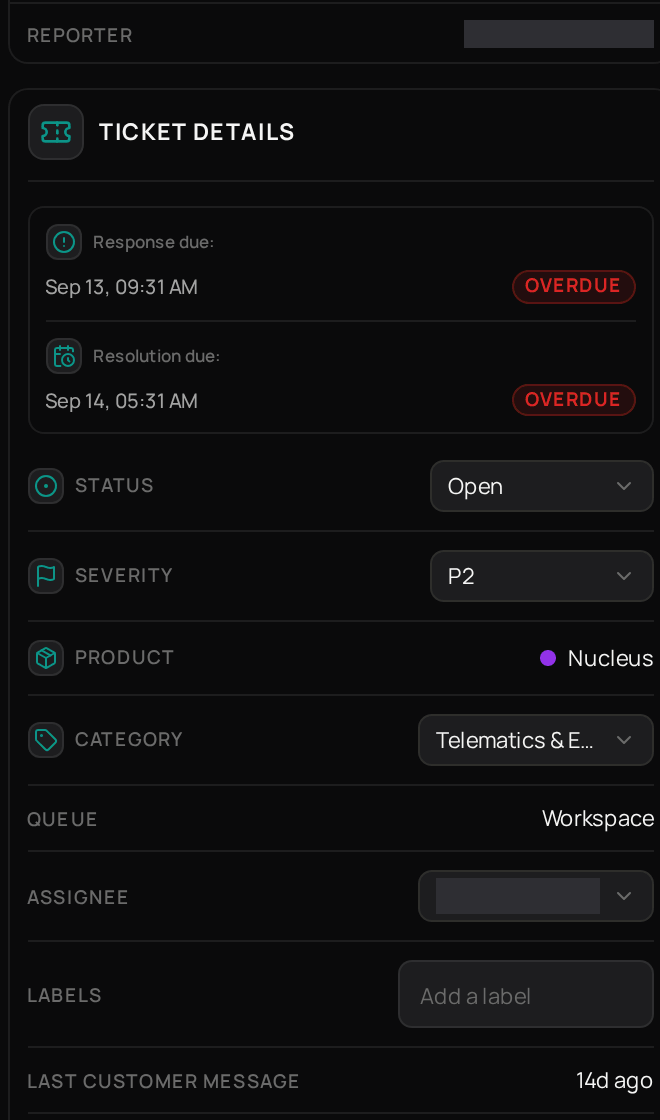
The ticket details panel, with response and resolution due, Status, Severity, Product, Category, Queue, Assignee and Labels.
Tenant Owners and Workspace Admins can change a ticket’s details on the right of its page, under Ticket details.
1

Set the status

Under Status, choose where the ticket stands, such as In progress.
2

Set the priority

Under Severity, choose P1, P2 or P3.
3

Choose a category

Under Category, pick the area the ticket is about.
4

Assign it

Under Assignee, choose who should handle it.
5

Label it if you want

Type in Add a label to tag the ticket.
Each change shows straight away. Next, resolve the ticket when it is done.

Resolve a ticket

When the customer has what they need, resolve the ticket.
1

Resolve it

Select Resolve at the top of the ticket.
2

Confirm

Select Resolve again to confirm.
The ticket now shows as Resolved, and it moves to the Resolved tab in your Inbox. Next, see what needs you today.

Troubleshooting

Workspace Members see internal notes only when Member access to internal notes is on. Ask a Tenant Owner or Workspace Admin to turn it on in Aegis settings.
Check that Aegis is turned on for their company in Studio settings under Accounts, on the Products tab.