

 Pulse
Pulse Lexis
Lexis Vera
Vera Aegis
Aegis Prism
Prism Nucleus
Before you start
If a module is only for some of your customers, check that their accounts exist first. Accounts are managed in Studio settings under Accounts.Create a module
1
Start a module
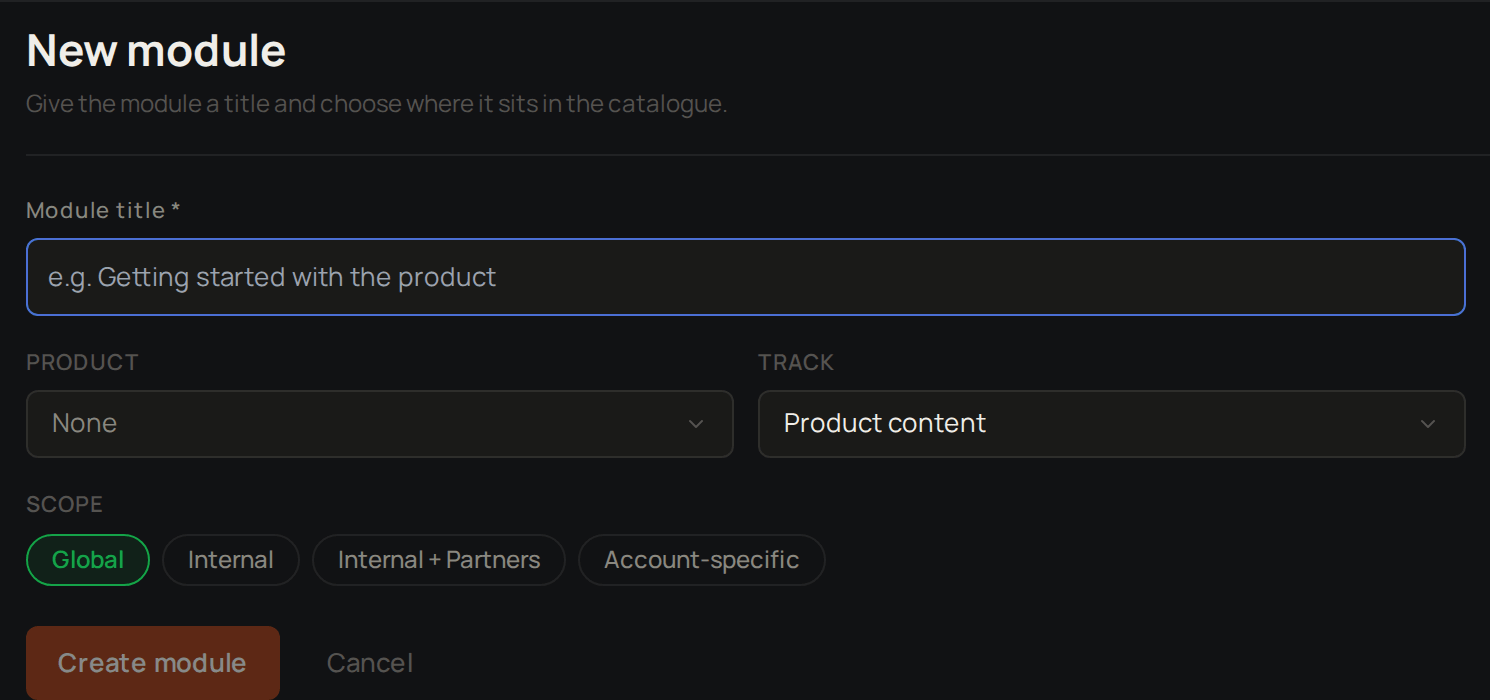
Select Modules, then New module.
2
Name it
Enter the Module title.
3
Choose the product
Choose a Product if the module is about one of your products.
4
Label the content
Choose a Track, such as Product content or Client content. This Track labels the kind of content and is not the same as a Lexis track.
5
Choose who can see it
Under Scope, choose Global, Internal, Internal + Partners or Account-specific.
6
Pick the accounts
If you chose Account-specific, select Add account… and pick each account.
7
Create it
Select Create module.
Add a step
1
Open the module
Select the module in the list. Its steps are under Sections & Steps.
2
Open the section
If the module has sections, open the section first.
3
Start a step
Select Add step. In a module with sections, it is the Add step inside the section.
4
Add the video
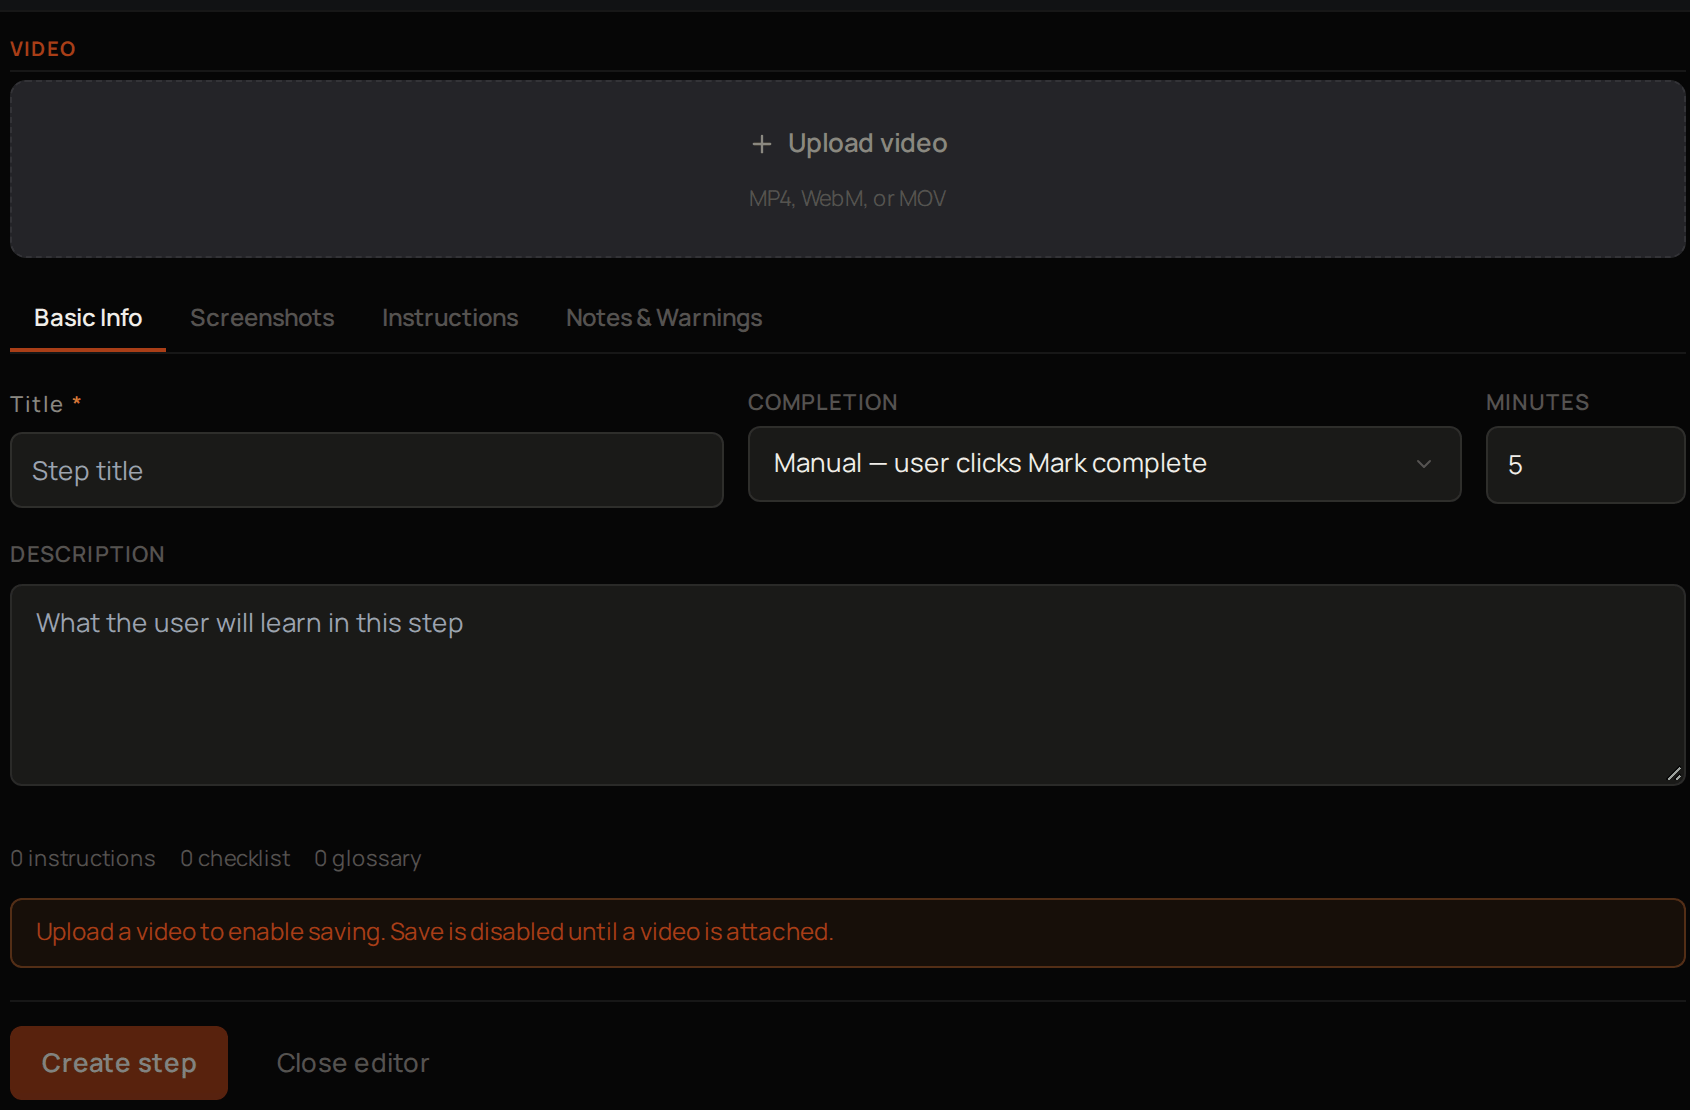
Select Upload video and choose your file.
5
Name it
On Basic Info, enter a Title.
6
Describe it
Enter a Description of what the learner will learn.
7
Set the time
Set Minutes to how long the step takes.
8
Choose how it is completed
Under Completion, choose whether the learner marks the step complete, the step completes when the video ends, or the learner ticks off a checklist.
Add instructions, notes and screenshots
1
Add instructions
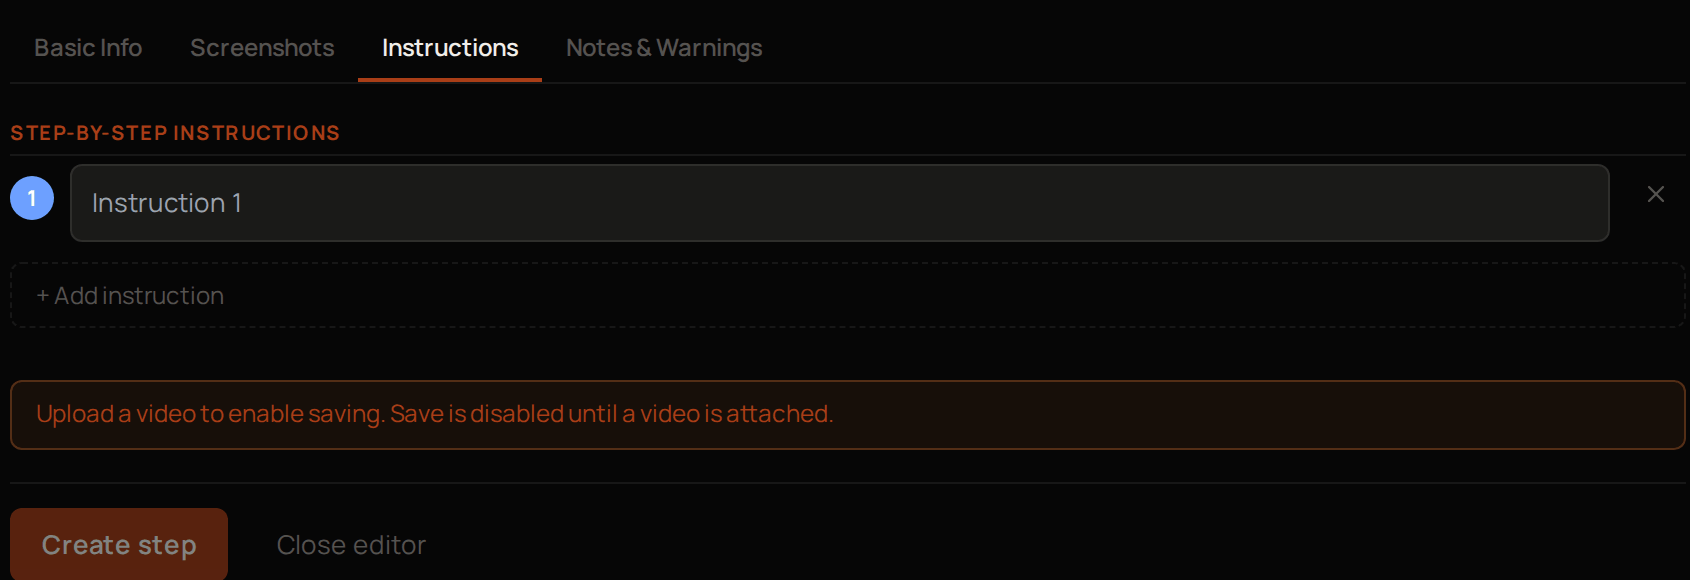
On Instructions, select + Add instruction for each thing the learner should do.
2
Add a note or a warning
On Notes & Warnings, fill in Note (blue info) or Warning (amber) if the learner needs one.
3
Add screenshots
On Screenshots, select Add and choose each image.
4
Save
Select Create step.
1
Open the step
Select the arrow at the end of the step’s row.
2
Change it
Make your changes on any tab.
3
Save
Select Save step.
Organise steps into sections
1
Switch to sections
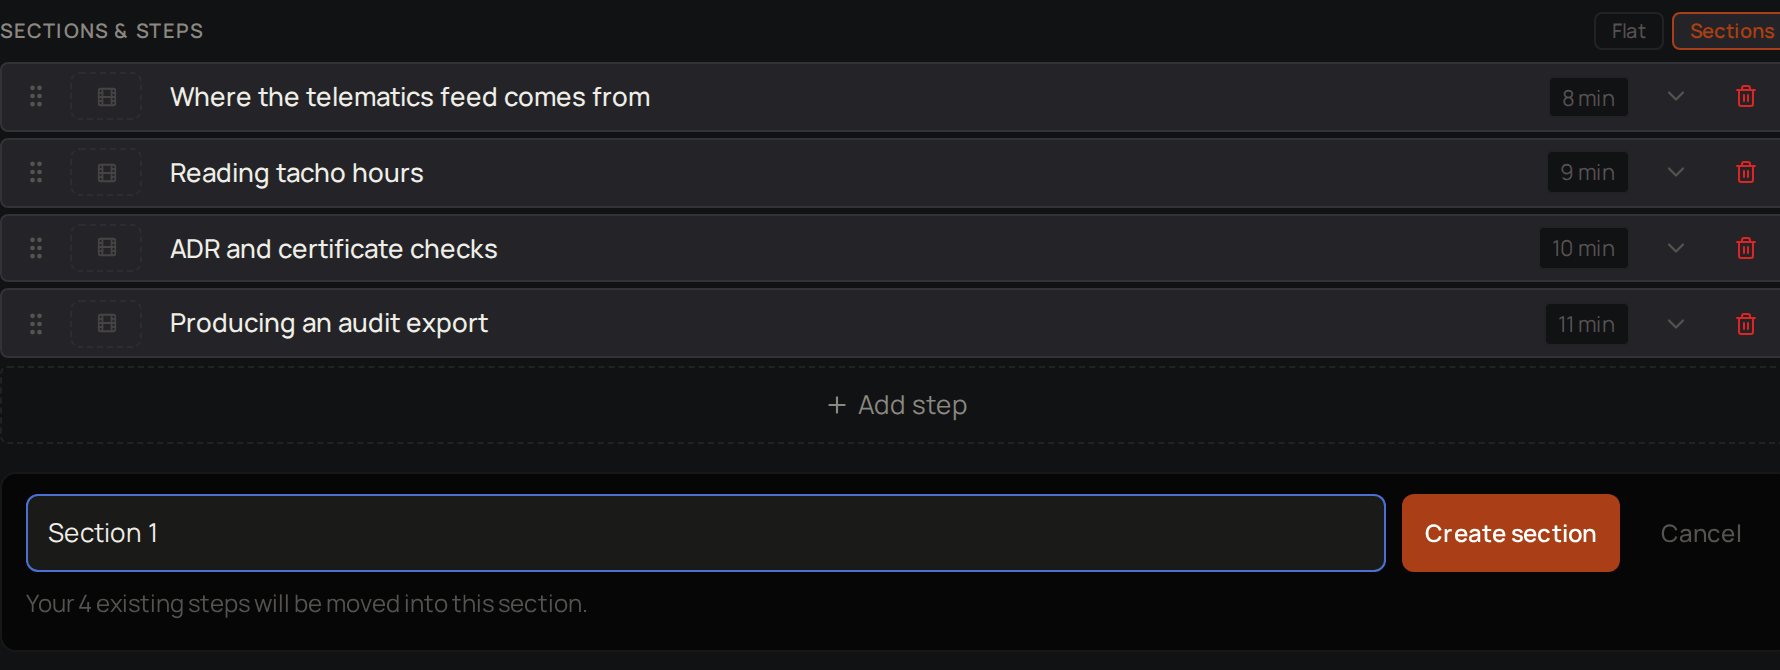
Under Sections & Steps, select Sections.
2
Name the first section
Type a section title, such as Getting started.
3
Create it
Select Create section. The steps you already have move into it.
1
Start a section
Select Add section.
2
Name it
Type the section’s title.
3
Create it
Select Create.
Publish a module
At the top of the module, select Published. Learners the module is open to can now see it and start it. Select Draft to take it back out of their view while you work on it. Next, choose who can see it.Choose who can see a module
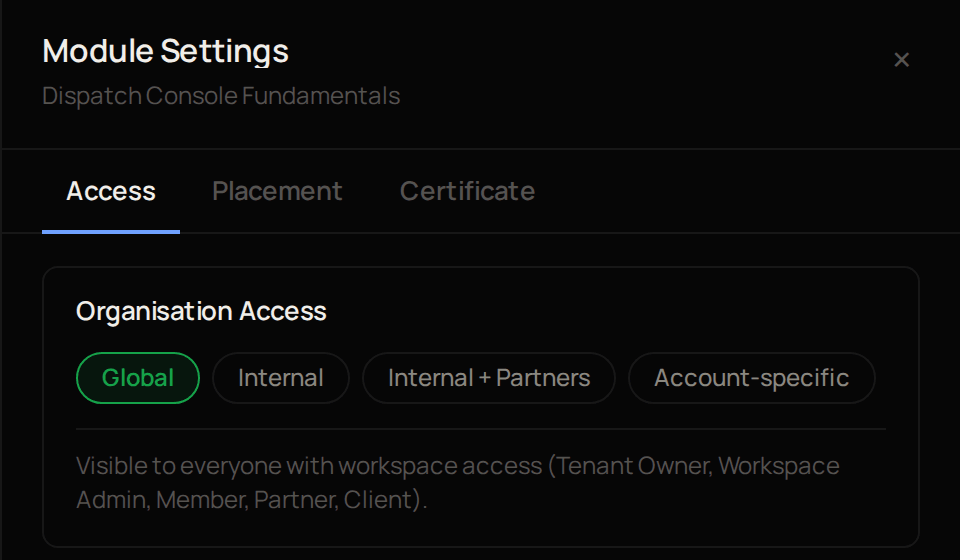
1
Open the settings
At the top of the module, select Module Settings.
2
Choose the scope
On Access, under Organisation Access, select Global, Internal, Internal + Partners or Account-specific.
3
Pick the accounts
If you chose Account-specific, select Add account… and pick each account.
Troubleshooting
Lexis says it cannot publish a module with no steps
Lexis says it cannot publish a module with no steps
Add at least one step, then select Published again.
Create module stays greyed out
Create module stays greyed out
Enter a Module title. For an Account-specific module, also add at least one account.
A module went back to Draft
A module went back to Draft
This happens when you delete its last step. Add a step, then publish it again.
Create step stays greyed out
Create step stays greyed out
Upload the step’s video first. Create step stays greyed out until a video is attached.
Your video file cannot be uploaded
Your video file cannot be uploaded
Upload video takes MP4, WebM and MOV files. Save the video in one of these formats, then upload it again.