

 Pulse
Pulse Lexis
Lexis Vera
Vera Aegis
Aegis Prism
Prism Nucleus
Before you start
The video must already be uploaded to a step. See add a step. Tenant Owners and Workspace Admins can open Videos. Anyone who builds modules can set a video’s language and dub it from the step itself.Set the video’s language
1
Open the step
In Modules, open the module and select the arrow at the end of the step’s row.
2
Open the language settings
Select Language & Translations.
3
Choose the language
Under Source language & transcript, choose the language spoken in the video as the Source language. It is saved straight away.
Dub a video
1
Find the video
Select Videos, then select the video to show its languages.
2
Add a language
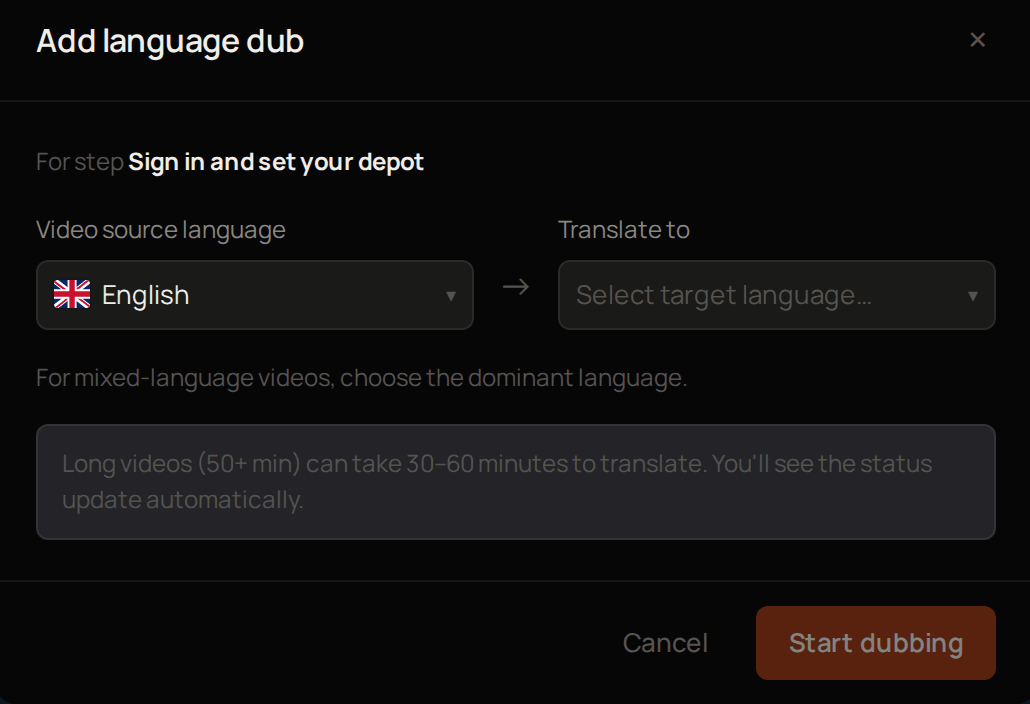
Select + Add language dub.
3
Check the source
Make sure Video source language is the language spoken in the video.
4
Pick the main language
If the video is in more than one language, choose the main one as the Video source language.
5
Pick the new language
Under Translate to, choose the language you want.
6
Start it
Select Start dubbing.
1
Open the step
In Modules, open the module and select the arrow at the end of the step’s row.
2
Open the language settings
Select Language & Translations.
3
Add languages
Under Translations, select Add language.
4
Pick the languages
Under Available languages, tick each language. Use Search languages… to find one quickly.
5
Submit
Select Submit.
Follow your dubs
Re-dub or remove a language
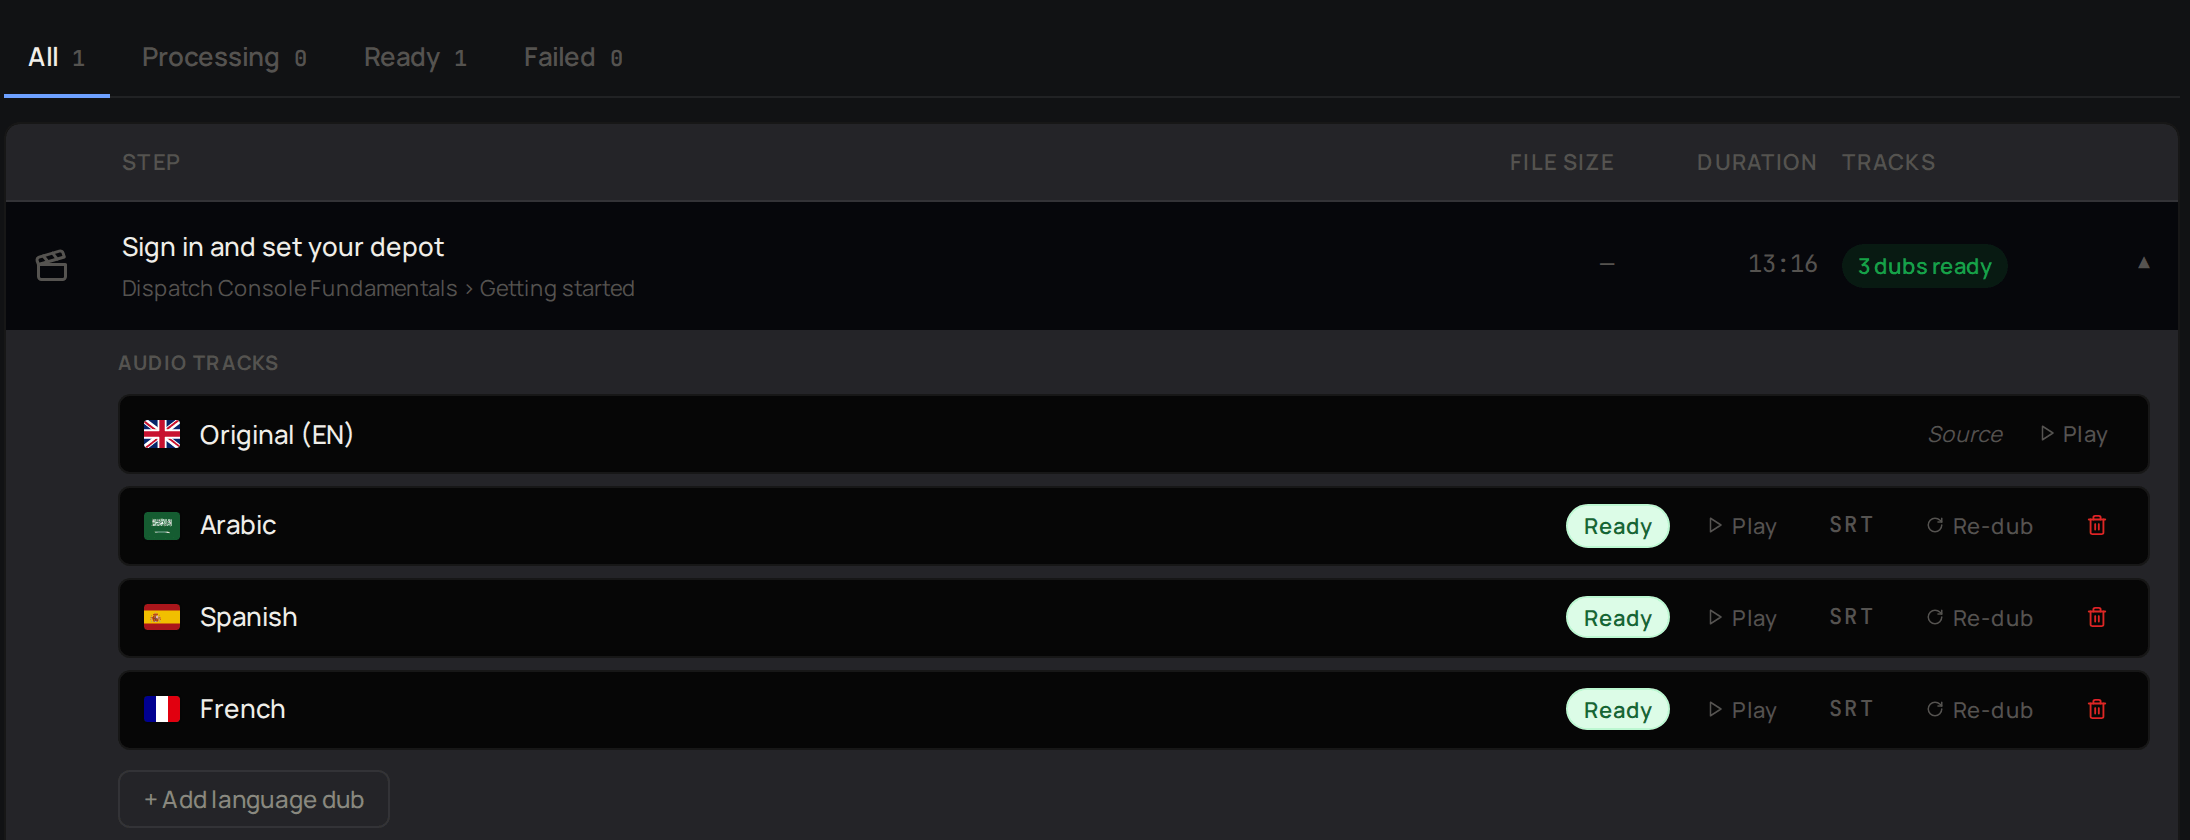
Select Re-dub next to a language to make it again from the start. To remove a language, select the bin next to it. Learners can no longer choose that language. Next, turn transcripts on or off for your workspace.Turn transcripts on or off
Tenant Owners and Workspace Admins can choose whether steps capture a transcript by default.1
Open the settings
Select Settings in the Lexis sidebar and find Dubbing & Languages.
2
Choose the default
Turn Capture source transcript by default on or off.
3
Save
Select Save.
Troubleshooting
The transcript shows Failed
The transcript shows Failed
Ask Intellikon for help, and say which module and step it is.
A dub shows Failed
A dub shows Failed
Open the video on Videos and select Re-dub next to that language.
Videos says No video dubs yet
Videos says No video dubs yet
Only steps with a video appear on Videos. Add a video to a step first.
You cannot change the source language
You cannot change the source language
Lexis waits until the transcript has finished before it lets you change the language. Try again once the status has changed.