

 Pulse
Pulse Lexis
Lexis Vera
Vera Aegis
Aegis Prism
Prism Nucleus
Before you start
Tenant Owners and Workspace Admins can connect data sources. Workspace Members can see the sources already connected.Connect a built-in source
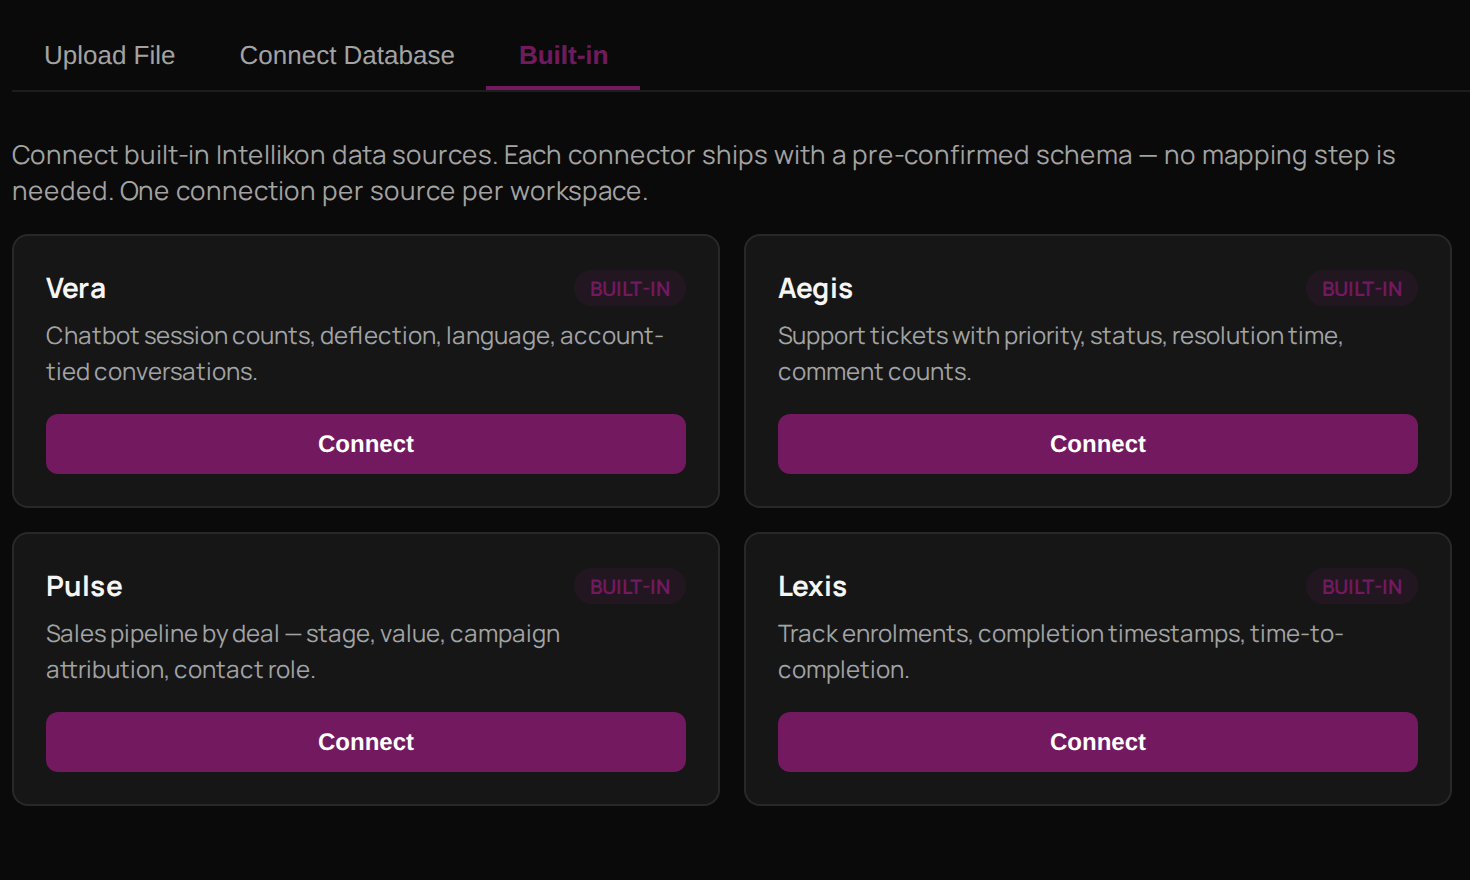
1
Start
Select Data Sources, then Connect new source.
2
Choose Built-in
Select Built-in.
3
Connect
Under the product you want, select Connect.
Upload a file
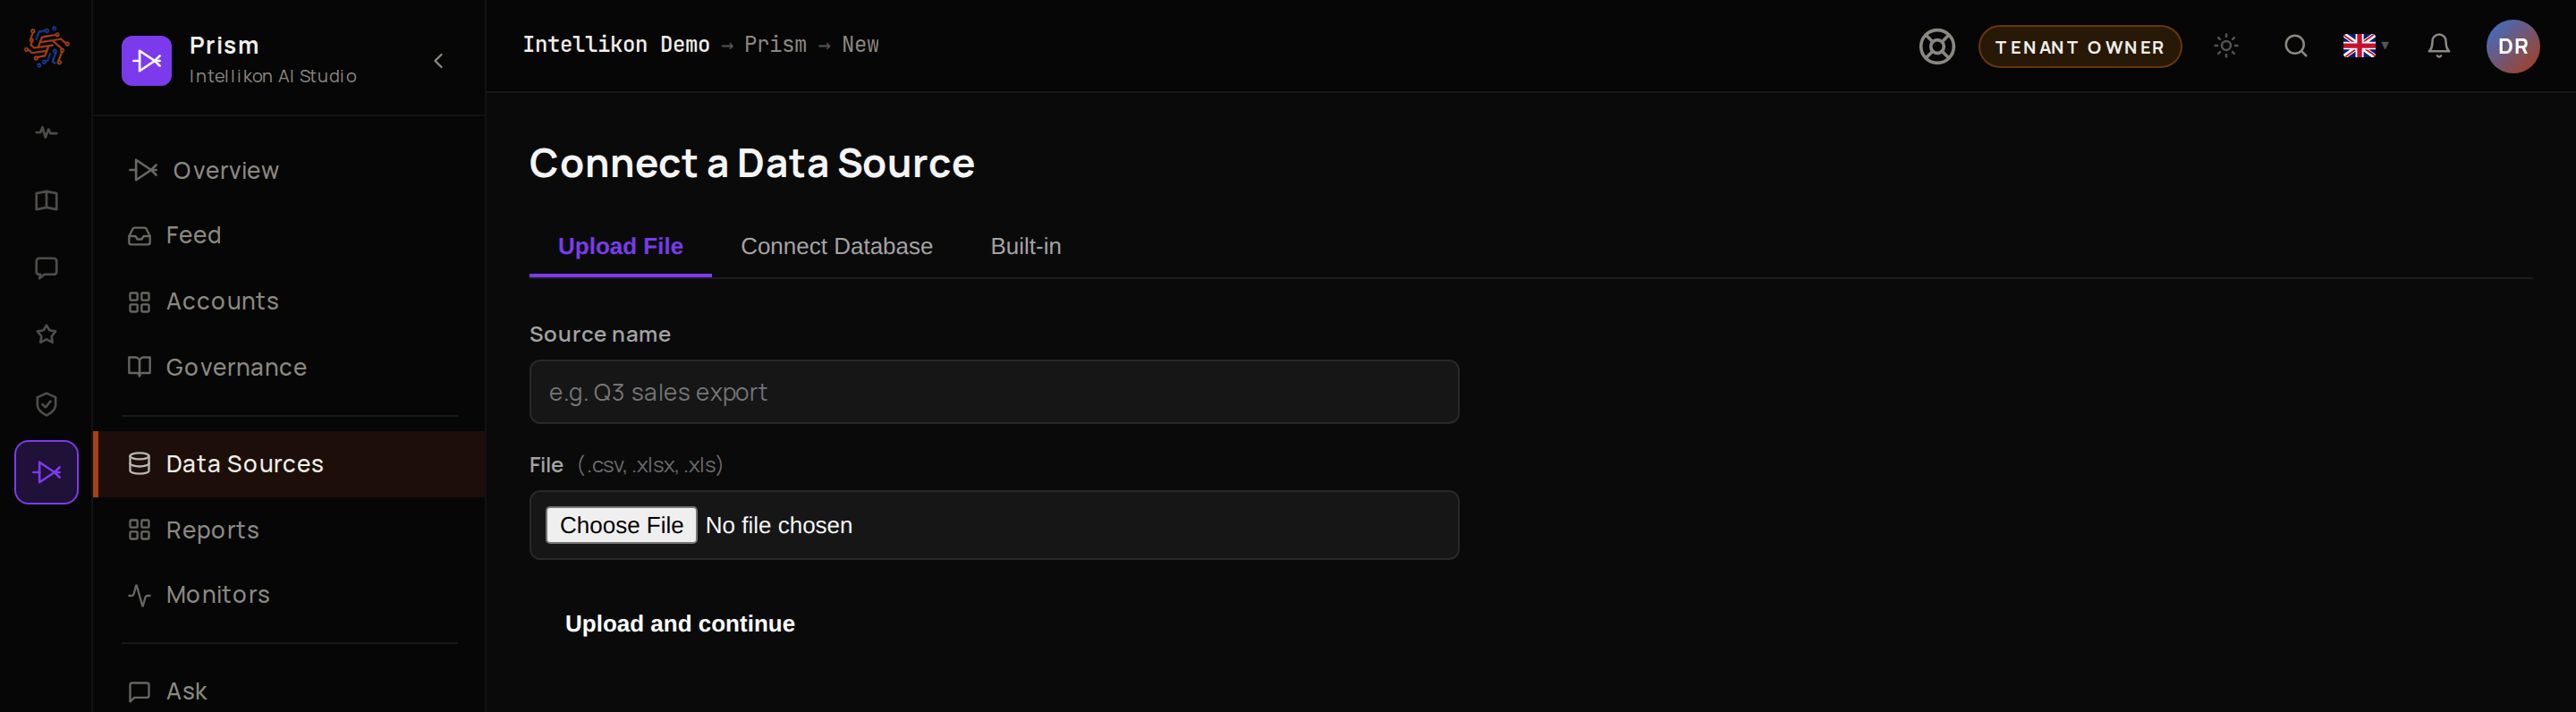
1
Start
Select Data Sources, then Connect new source. Upload File is already selected.
2
Name it
Enter a Source name your team will recognise.
3
Choose the file
Under File, choose a CSV or Excel file.
4
Upload
Select Upload and continue.
Connect a database
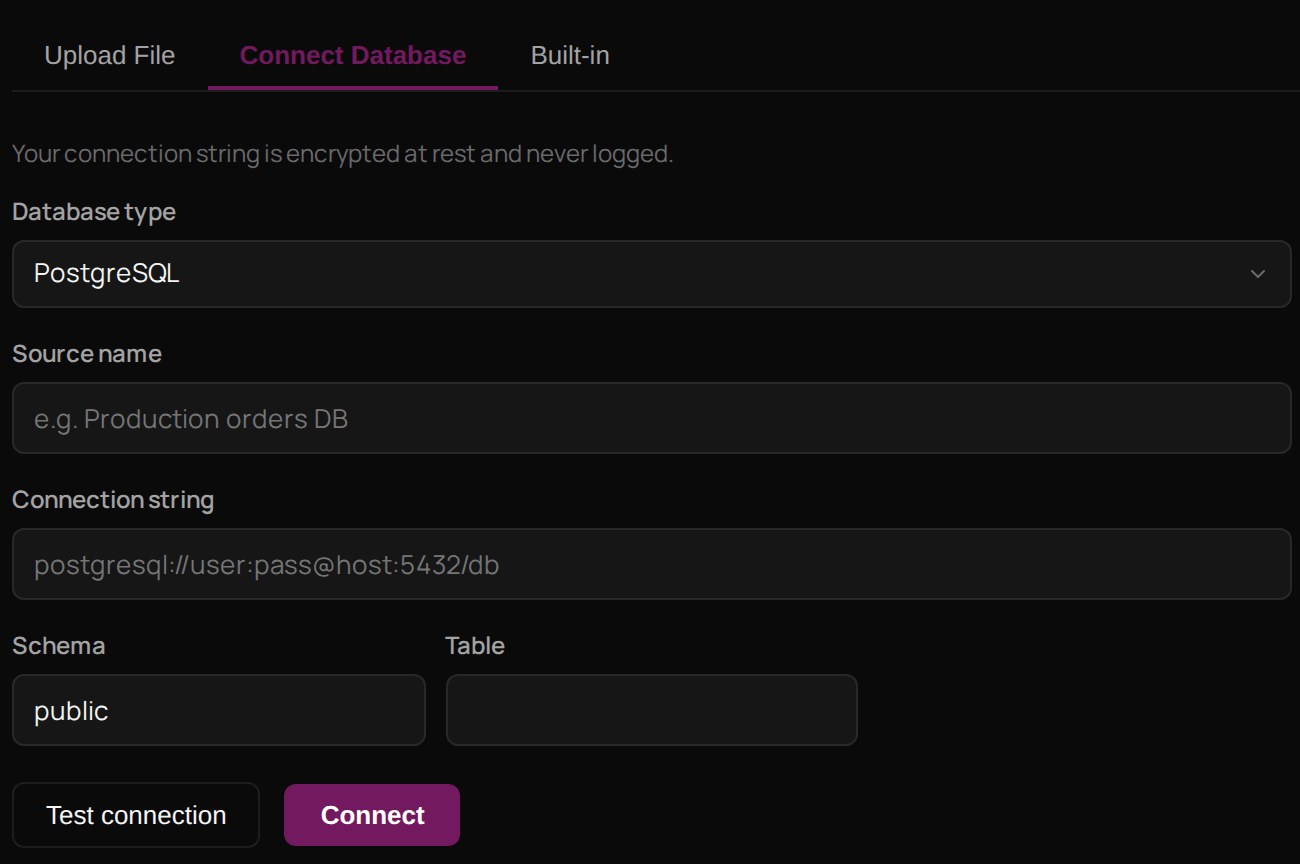
1
Start
Select Data Sources, then Connect new source, then Connect Database.
2
Choose the type
Under Database type, choose PostgreSQL, MySQL / MariaDB, SQLite or SQL Server.
3
Name it
Enter a Source name your team will recognise.
4
Say where the data is
Enter the Connection string.
5
Choose the table
Enter the Table to read.
6
Fill in the rest
If the form shows any other field for that type, such as Schema, fill it in.
7
Test it
Select Test connection and wait for the result.
8
Connect
Select Connect.
Troubleshooting
Upload and continue stays greyed out
Upload and continue stays greyed out
Enter a Source name and choose a file. Both are needed before you can upload.
Test connection shows Failed
Test connection shows Failed
Read the reason after Failed, such as the username or password being rejected. Correct the connection string, then test again.
Prism says the workspace already has that source connected
Prism says the workspace already has that source connected
Each built-in source can be connected once per workspace. Open the one you already have from Data Sources.