

 Pulse
Pulse Lexis
Lexis Vera
Vera Aegis
Aegis Prism
Prism Nucleus
Before you start
Tenant Owners, Workspace Admins and Workspace Members can create chatbots and change them. The models you can choose from are the ones your workspace allows; Tenant Owners and Workspace Admins manage these in Studio settings under AI Models.Create a chatbot
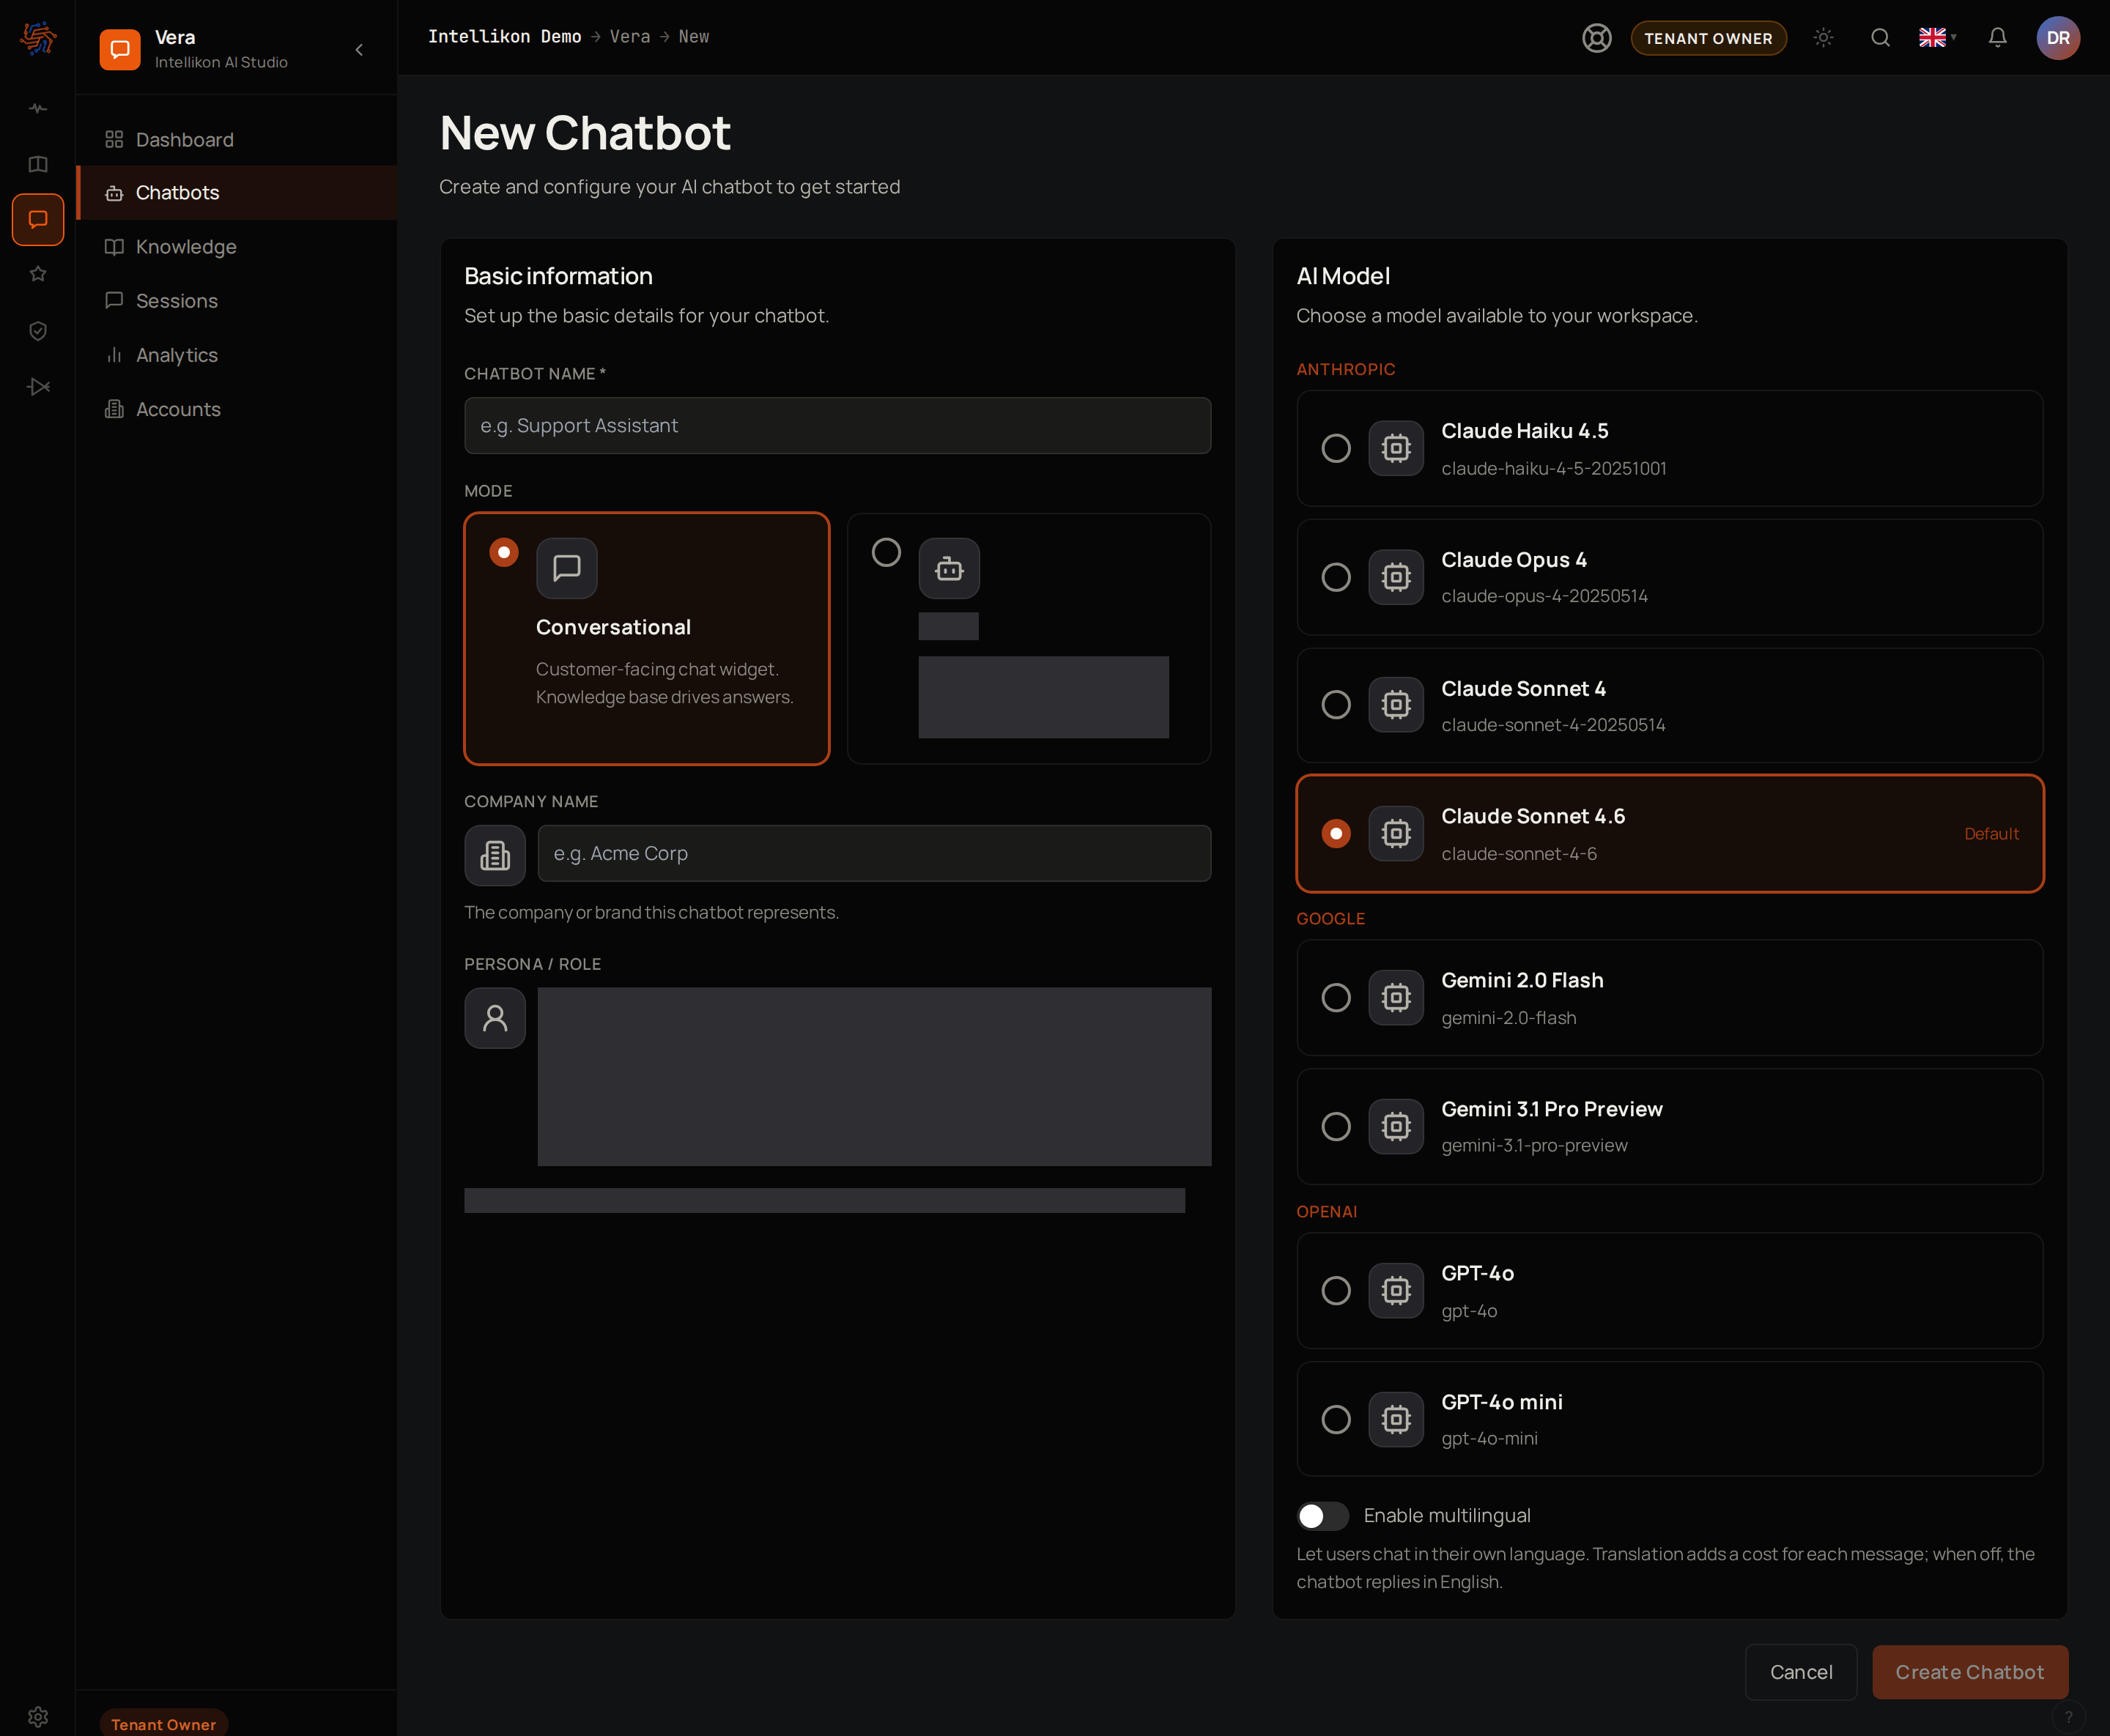
1
Start a chatbot
Select Chatbots, then New chatbot.
2
Name it
Enter a Chatbot Name. This is the name people see when they chat with it.
3
Say who it speaks for
Under Company Name, enter the company or brand the chatbot represents.
4
Choose a model
Under AI Model, pick one, or keep the one marked Default.
5
Choose its languages
Turn on Enable multilingual if people will ask questions in other languages. When it is off, the chatbot replies in English.
6
Create it
Select Create Chatbot.
Turn it on
People can start a conversation with a chatbot only when it is active.1
Open the chatbot
Select Chatbots, then Open on the chatbot.
2
Turn it on
Select Activate.
Try it in Live Preview
Live Preview on the chatbot’s page lets you talk to the chatbot as anyone else would. Type a question in the message box at the bottom and press Enter, or select one of the suggested questions. Read the reply, and open Sources under it to see which knowledge it came from. Select ↺ Reset session for a new conversation. If the chatbot has Enable multilingual turned on, choose a language at the top of Live Preview to try it in that language. Each preview conversation is saved like any other and appears under Sessions. If the answer is wrong or incomplete, see improve answers. Next, change how it answers.Change how it answers
1
Open the settings
On the chatbot’s page, select Settings.
2
Rename it
If you want a new name, change the Chatbot Name.
3
Change the company
If it now speaks for another company or brand, change the Company Name.
4
Change the model
If you want another model, change the AI Model.
5
Change its languages
If you want to change its languages, turn Enable multilingual on or off.
6
Save
Select Save Changes.
Suggest questions and offer a way to reach you
1
Open the settings
On the chatbot’s page, select Settings.
2
Add a starter
Under Conversation Starters, select Add starter question.
3
Suggest a first question
Type a question people often ask.
4
Put them in order
To change the order, drag the handles.
5
Offer a way to reach you
Under Escalation URL, enter the address of your contact or support page.
6
Save
Select Save Changes.
Turn a chatbot off
On the chatbot’s page, select Deactivate. You can also do this from Chatbots: in grid view, open the menu on the chatbot’s card and select Deactivate; in table view, select the power icon on its row. The chatbot shows as Inactive, and no one can start a new conversation with it. Its knowledge, settings and conversations are kept. Select Activate on its page or its card to turn it on again. Next, go back to the Vera overview.Troubleshooting
Create Chatbot stays greyed out
Create Chatbot stays greyed out
Enter a Chatbot Name and make sure a model is selected under AI Model.
The form says "No models are approved for this workspace yet"
The form says "No models are approved for this workspace yet"
Ask a Tenant Owner to approve and allow at least one model in Studio settings under AI Models.
Live Preview says "Activate to test"
Live Preview says "Activate to test"
The chatbot is a draft or inactive. Select Activate on its page.
Add starter question is greyed out
Add starter question is greyed out
A chatbot can have up to four conversation starters. Remove one with its bin icon to add another.
The chatbot says it does not have information on a question
The chatbot says it does not have information on a question
It could not find the answer in its knowledge. Add a source that covers the question, or write a curated answer.